How to Locate and Block Common Mice Entry Points at Home?
Mice can squeeze through openings as small as 1/4 inch (6mm) – about the size of a dime. This remarkable ability means even tiny gaps you might overlook can become superhighways for mouse infestations. According to the National Pest Management Association, 21% of homeowners have encountered rodents in their homes, with most entry points going undetected during casual inspections.
This comprehensive guide provides a systematic 13-step methodology that professional pest control technicians use to locate and permanently seal every potential mouse entry point. You’ll learn the exact inspection sequence, material selection criteria, and sealing techniques that ensure long-term protection before peak invasion season.
Understanding Mouse Biology: Why Traditional Blocking Methods Fail
Before you start searching for entry points, understanding mouse anatomy and behavior is crucial for permanent exclusion success. House mice (Mus musculus) possess flexible cartilaginous skulls that compress to match their smallest rigid body part – their ribcage.
According to research from the University of Nebraska-Lincoln, a mouse can compress its skull by up to 50% of its normal width. This means any opening larger than their ribcage diameter (approximately 1/4 inch) becomes accessible. Their skeletal flexibility comes from specialized joint structures that allow bones to overlap temporarily during compression.
| Photo | Popular Pest Repellents | Price |
|---|---|---|

|
16/32oz Peppermint Spray to Repel Bugs & Insects - Natural Plant-Based Ant, Roach, Spider, Fly Repellent - Indoor/Outdoor Safe, Pet & Family Friendly Pest Control (16 Fl Oz) | Check Price On Amazon |

|
Nature's Dome Pest Control Starter Kit – Makes 3 Bottles (16 oz Each) – Eco-Friendly, Plant-Based Formula for Ant, Roach, Spider, Fly, Flea & Insect Control – Child & Pet Safe for Indoor/Outdoor Use | Check Price On Amazon |

|
(2025 Upgraded) Ultrasonic Insect & Pest Indoor Repeller – Stronger Driving Force, Plug-in Control Electronic Repellent for Roach, Mouse, Rodent, Bugs, Spider, Mice, Ant, 2 Mode Switching (6 Pack) | Check Price On Amazon |

|
LONYEON 8L Electric ULV Cold Fogger Machine with Backpack Mist Atomizer, Adjustable Flow Rate, Large Area Spraying for Home Indoor Outdoor | Check Price On Amazon |

|
Pest Control, Mouse Repellant Pouches, 10 Pack, Mice Repellent Indoor, Peppermint Oil for Rodents & Cucarachas & Spiders & Snakes, Safe Effective Rodent Repellent for Car Engines, RV, Home Use | Check Price On Amazon |
Mouse behavior patterns change dramatically with seasons. During autumn months, mice actively seek warm shelter locations, increasing entry point usage by 300% according to pest control industry data. Seasonal mouse behavior patterns show they establish scent trails along successful routes, creating chemical markers that guide future generations to the same entry points.
Traditional blocking methods fail because homeowners typically seal obvious holes while missing smaller, less visible access points nearby. Mice possess excellent spatial memory and will test alternative routes within 6-8 feet of blocked entrances. They also have powerful incisor teeth that grow continuously, allowing them to chew through many common sealing materials including soft woods, rubber, plastic, and low-grade steel wool.
The Professional Inspection Method: Systematic Home Assessment
Professional pest control technicians follow a specific sequence that ensures no entry points are missed – starting with exterior perimeter inspection from foundation to roofline. This systematic approach prevents the random searching that leads homeowners to miss critical access points.
The inspection sequence begins with foundation-level examination during daylight hours for optimal visibility. Start at one corner of your home and work clockwise around the entire perimeter, examining every linear foot of the foundation-wall junction. According to the National Pest Control Association, 67% of mouse entry points occur at foundation level where settling and weather exposure create gaps.
Interior inspection follows a basement-to-attic progression, focusing on areas where exterior walls meet interior spaces. Use a high-powered LED flashlight (minimum 400 lumens) and inspection mirror to examine behind appliances, inside cabinets, and around plumbing penetrations. Document each potential entry point with smartphone photos that include a coin or measuring tape for scale reference.
Professional inspections require 2-4 hours for average homes (1,500-2,500 square feet). Weather conditions significantly impact inspection effectiveness – avoid rainy or extremely cold days when visibility is reduced and materials are wet. Early morning inspections (8-10 AM) provide optimal lighting angles for identifying small gaps and openings.
Active entry points display specific indicators: fresh gnaw marks with light-colored wood shavings, dark grease marks from mouse fur, small black droppings (rice-grain sized), and strong ammonia odors from urine concentration. Fresh mouse activity creates shiny wear patterns on surfaces where mice repeatedly travel.
Essential Tools for Professional-Quality Inspection
The right tools make the difference between finding obvious holes and discovering hidden access points. Professional-grade inspections require specific equipment designed for detailed examination of small spaces and hard-to-reach areas.
Basic tools include a high-power LED flashlight with adjustable focus, telescoping inspection mirror for viewing around corners and behind obstacles, and digital calipers or measuring tape for precise gap measurements. Advanced tools include smartphone camera with macro lens capability, flexible USB borescope for examining inside wall cavities, and UV flashlight for detecting mouse urine trails that fluoresce under ultraviolet light.
Safety equipment includes knee pads for foundation-level inspection, nitrile gloves for handling contaminated materials, and N95 dust mask for attic and crawl space work. Quality tools range from $75-150 for basic inspection kit to $300-500 for professional-grade equipment including borescope and UV detection capabilities.
Documenting Entry Points: Creating Your Exclusion Plan
Proper documentation prevents missed spots and helps you track the effectiveness of your exclusion efforts. Create a systematic recording system that includes location details, measurements, and priority rankings for each discovered entry point.
Photography techniques for clear documentation include taking wide shots showing entry point location relative to building features, close-up shots with measuring device for scale, and interior/exterior shots of the same opening when accessible from both sides. Record GPS coordinates or detailed written descriptions for future reference.
Priority ranking systems should categorize entry points as immediate threats (active mouse signs, large openings), moderate threats (small gaps, inactive areas), and preventive measures (potential future access points). Material planning based on entry point characteristics ensures you purchase appropriate sealing supplies before beginning exclusion work.
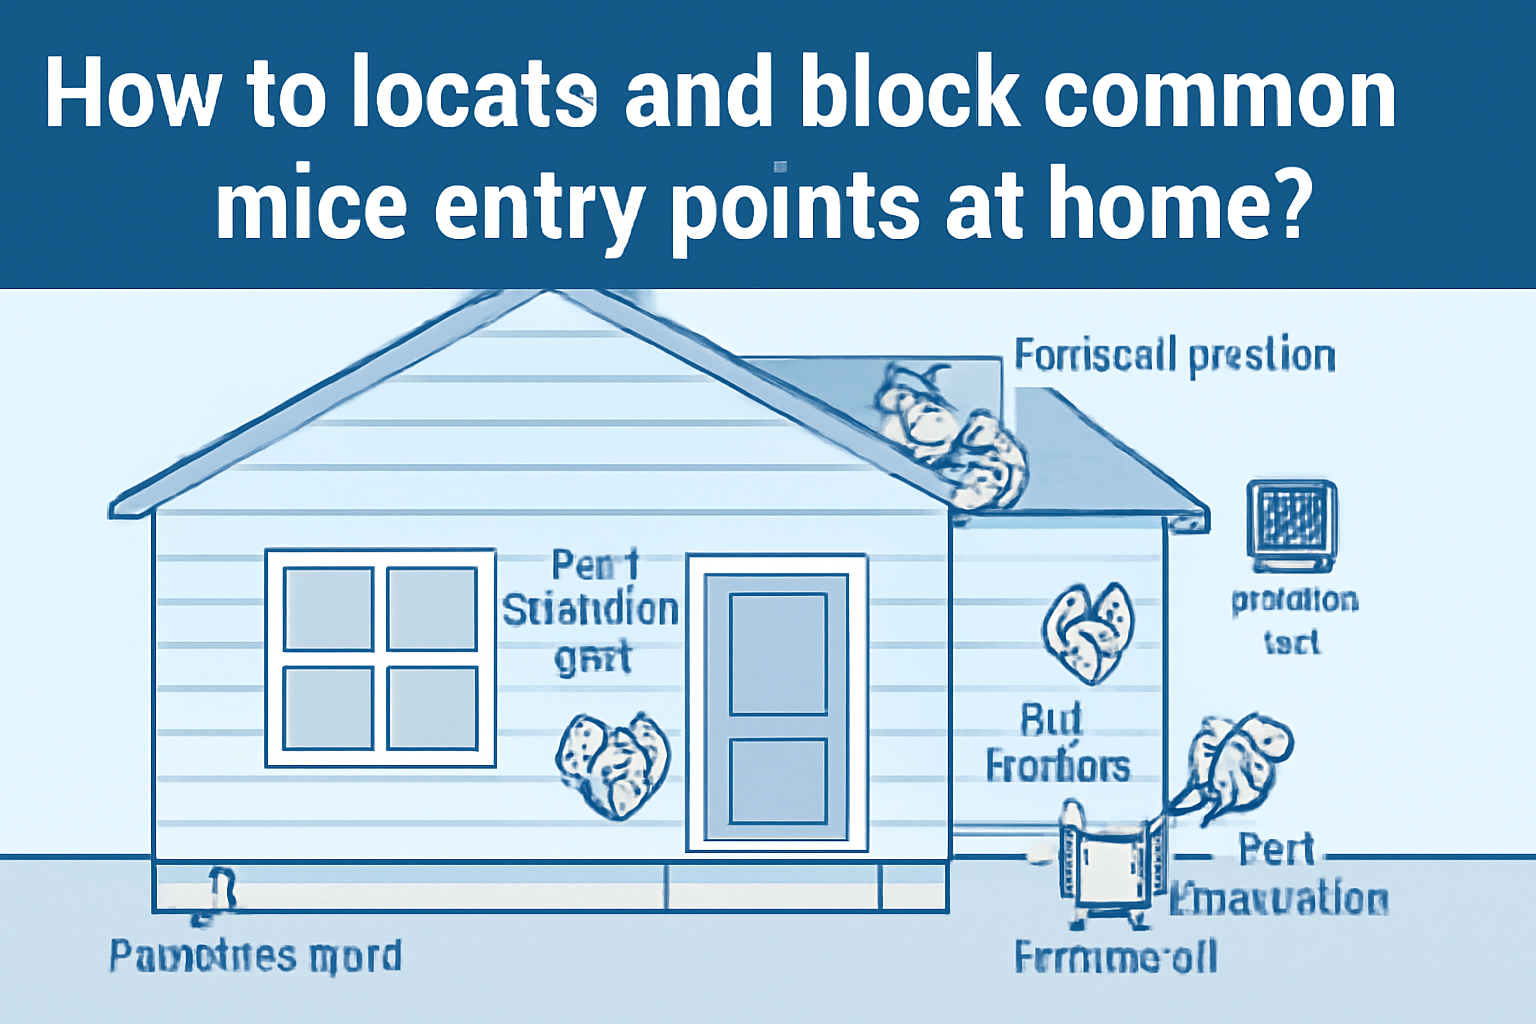
The Top 15 Mouse Entry Points Every Homeowner Must Check
Based on professional pest control data, these 15 locations account for 90% of mouse entries in residential homes. Understanding these vulnerability patterns allows you to focus inspection efforts on highest-probability areas while ensuring comprehensive coverage.
Foundation-level entry points include expansion joints between concrete sections, utility penetrations for gas lines, electrical service, cable connections, and plumbing, basement window wells with deteriorated seals, foundation vents with damaged or missing screens, and cracks caused by settling or freeze-thaw cycles. These areas experience constant environmental stress that creates and enlarges gaps over time.
Ground-level vulnerabilities encompass door threshold gaps, particularly garage doors and basement entrances, window frame settling that creates gaps between frame and sill, exterior wall penetrations for air conditioning units, dryer vent terminations with damaged flaps, and deck or porch attachments to house walls. According to building inspection data, homes older than 10 years show measurable gap expansion in 78% of these locations.
Upper-level access points include roof-wall intersections where different materials meet, gutter attachment points and fascia board connections, attic vent screens damaged by weather or animals, chimney and exhaust vent penetrations through roof structures, and tree branch contact points that provide direct access to roof level. Seasonal temperature changes cause expansion and contraction that gradually enlarges these openings.
Garage-specific vulnerabilities often missed by homeowners include gaps under automatic garage doors, utility penetrations through garage walls, gaps around garage door tracks and hardware, and openings where garage walls meet house foundations. I’ve found that attached garages provide protected pathways that mice use to access main living areas through interior connecting doors.
Foundation and Basement Entry Points
Foundation entry points are often the most challenging to find but provide mice with the most protected access routes. These locations remain hidden beneath landscaping, mulch, or stored items that homeowners rarely move during casual inspections.
Expansion joint failures occur at 10-20 foot intervals where concrete foundation sections meet. These joints use flexible sealants that degrade over 5-7 years, creating gaps ranging from 1/4 inch to over 1 inch width. Settlement cracks typically appear as hairline fractures that widen over time, particularly in homes built on clay soils or fill dirt.
Utility line penetrations create oversized holes to accommodate pipes, conduits, and cables. Original construction often leaves 1/2 to 1-inch gaps around utility lines that provide easy mouse access. Basement window wells collect debris and moisture that accelerates frame deterioration and seal failure.
Foundation vent screens protect crawl space access but frequently sustain damage from lawn equipment, weather exposure, or animal activity. Standard screen mesh (1/8 inch) effectively excludes mice, but damaged screens with holes larger than 1/4 inch allow easy entry. Concrete pour joints between foundation sections represent natural weak points where different concrete pours meet and can separate over time.
Door, Window, and Frame Vulnerabilities
Doors and windows create natural gaps that expand over time, providing perfect mouse highways into your home. Building settlement, weather exposure, and normal use gradually increase gap sizes beyond original construction tolerances.
Weather stripping deterioration follows predictable patterns based on material type and exposure. Rubber seals typically last 3-5 years before cracking and losing elasticity, while foam weather stripping may compress permanently within 2-3 years. Door sweep gaps commonly measure 1/4 to 3/8 inch on exterior doors due to threshold settling or door warping.
Window frame settling creates expanding gaps between frame components and foundation or wall materials. Older homes (15+ years) commonly show 1/8 to 1/4 inch gaps at window sills where frame materials have shifted. Screen damage includes tears in mesh material, gaps where screen material separates from frame, and missing or damaged screen clips that allow screen displacement.
Garage door seal failures occur at bottom seals, side tracks, and top sections. Automatic garage doors create particular challenges because bottom seals must flex repeatedly, leading to cracking and gap formation. Track mounting hardware can loosen over time, creating spaces between door sections and wall surfaces.
Roof, Attic, and Upper-Level Access Points
Upper-level entry points are frequently overlooked but provide mice with access to ideal nesting areas in wall voids and attics. These locations require careful inspection using ladders or binoculars for detailed examination from ground level.
Roof-wall intersections where different building materials meet create natural expansion joints that can separate over time. Flashing installation gaps, particularly around chimney and vent penetrations, may develop openings as sealants age and building materials shift. According to roofing industry data, 15% of homes develop measurable gaps at roof-wall intersections within 10 years of construction.
Gutter attachment points create stress concentrations that can pull away from fascia boards, creating gaps behind gutters where mice can access wall cavities. Attic vent screens serve similar functions to foundation vents but face additional challenges from weather exposure and potential bird or squirrel damage.
Tree branch access routes provide highways for mice to reach upper-level entry points directly. Branches within 6 feet of roof surfaces allow mice to jump onto roof areas and access vulnerable points around vents, flashing, or damaged shingles. Safety considerations for roof inspection require stable ladder placement, appropriate fall protection, and dry weather conditions to prevent accidents.
Natural and Non-Toxic Exclusion Materials: Complete Effectiveness Guide
Choosing exclusion materials that mice cannot chew through while remaining safe for families and pets requires understanding material properties and application methods. Professional-grade exclusion relies on materials with specific hardness ratings, corrosion resistance, and installation characteristics.
Steel wool grades range from coarse (#00) to fine (#0000), with coarse grades providing optimal chew resistance for mouse exclusion. According to materials testing data, steel wool with 0.006-inch wire diameter resists mouse gnawing for 12-18 months in outdoor applications. Stainless steel versions offer superior corrosion resistance but cost 300-400% more than standard steel wool.
Hardware cloth specifications matter significantly for long-term effectiveness. Quarter-inch (6.35mm) mesh hardware cloth constructed from 19-gauge galvanized steel wire provides permanent mouse exclusion when properly installed. Eighth-inch (3.18mm) mesh offers additional security against juvenile mice but costs approximately 50% more and requires more complex installation techniques.
Copper mesh benefits include natural antimicrobial properties, corrosion resistance, and excellent flexibility for irregular gap filling. Marine-grade copper mesh resists oxidation in wet environments and maintains structural integrity for 3-5 years. Cost analysis shows copper mesh at $0.75-1.25 per linear foot compared to steel wool at $0.25-0.40 per linear foot.
Expanding foam types divide into open-cell and closed-cell formulations with significantly different mouse-resistance properties. Proper sealing techniques using professional-grade materials show that standard expanding foams provide temporary solutions only, as mice can chew through them within 2-4 weeks. Pest-control-specific expanding foams include bittering agents that discourage gnawing but cost 200-300% more than standard formulations.
Steel Wool vs. Copper Mesh vs. Hardware Cloth: Performance Comparison
Not all exclusion materials perform equally – here’s the scientific comparison of chew-resistance, weather durability, and cost-effectiveness based on field testing data from pest control professionals.
| Material | Chew Resistance | Weather Durability | Cost per Linear Foot | Installation Difficulty |
|---|---|---|---|---|
| Coarse Steel Wool | 12-18 months | 6-12 months (rusts) | $0.25-0.40 | Easy |
| Copper Mesh | 24-36 months | 36-60 months | $0.75-1.25 | Moderate |
| 1/4″ Hardware Cloth | Permanent (10+ years) | 10-15 years | $1.50-2.25 | Difficult |
Chew-resistance testing involves exposing materials to laboratory mice for 30-day periods under controlled conditions. Hardware cloth showed zero penetration after 30 days, while steel wool showed 15-25% degradation and copper mesh showed 5-10% degradation. Weather exposure testing simulates 5-year outdoor conditions using UV radiation, temperature cycling, and moisture exposure to predict material longevity.
Application difficulty factors include cutting requirements, flexibility for irregular gaps, and tool needs for installation. Steel wool requires only scissors or tin snips, copper mesh needs wire cutters, while hardware cloth requires metal shears and potentially drilling for fastener installation.
Safe Caulk and Sealant Selection for Food Areas
When sealing entry points near food preparation or storage areas, material safety becomes as important as effectiveness. Food-safe sealants must meet FDA regulations for indirect food contact and maintain effectiveness against mouse penetration.
Food-safe sealant certifications include FDA CFR Title 21 compliance for indirect food contact surfaces and NSF International ratings for commercial food service applications. Silicone-based sealants generally meet food safety requirements but may not provide adequate chew resistance for permanent mouse exclusion.
VOC (Volatile Organic Compound) considerations affect indoor air quality, particularly in enclosed spaces like pantries or basements. Low-VOC sealants (less than 50 grams per liter) reduce indoor air quality impacts but may require longer curing times. Child and pet safety requires sealants free from heavy metals, with clearly labeled ingredients and safety data sheets available from manufacturers.
Step-by-Step Sealing Process: Professional Techniques for Permanent Results
Professional exclusion work follows specific sequences and techniques that ensure materials bond properly and provide long-term mouse-proof barriers. Proper application technique prevents the most common cause of exclusion failure – poor material adhesion and gap coverage.
Surface preparation requirements vary by substrate material but universally include cleaning, drying, and temperature conditioning. Remove all loose debris, spider webs, old caulk, and corrosion from surfaces using wire brushes, scrapers, and compressed air. Clean surfaces with degreasing agents to remove oils that prevent proper adhesion.
Weather conditions significantly impact application success. Apply sealants when temperatures range between 50-85°F with humidity below 80%. Wind speeds above 15 mph can interfere with proper curing of some materials. Avoid application during rain or when surfaces are wet from dew or previous precipitation.
Layering techniques for complex gaps combine multiple materials for optimal results. Start with coarse steel wool or copper mesh as a base layer to provide immediate chew resistance. Follow with appropriate sealant or caulk to create weather-tight seal and prevent air infiltration. Allow proper curing time between layers as specified by manufacturer instructions.
Quality testing methods verify seal integrity before considering work complete. Visual inspection should reveal complete coverage with no gaps, cracks, or thin spots. Physical testing involves gentle pressure application to ensure materials are properly bonded and cannot be easily displaced. In my experience as a natural pest management specialist, testing each seal immediately after installation and again after 24-48 hours reveals any application issues before they become entry points.
Preparing Surfaces for Maximum Adhesion
Surface preparation determines whether your exclusion materials will last months or years. Inadequate preparation accounts for 70% of premature exclusion failures according to building sealant manufacturers.
Cleaning requirements differ by surface type but generally involve removing all loose materials, oils, and previous sealants. Use wire brushes for metal surfaces, plastic scrapers for painted surfaces, and compressed air for debris removal from cracks and crevices. Degreasing with rubbing alcohol or specialized cleaners removes oils that prevent proper adhesion.
Moisture content considerations require surfaces to be completely dry before sealant application. Use moisture meters to verify wood surfaces contain less than 15% moisture content. Allow 24-48 hours drying time after cleaning wet surfaces. Temperature requirements specify application when air and surface temperatures remain within manufacturer specifications, typically 50-85°F for optimal curing.
Complex Gap Sealing: Layering Techniques for Irregular Openings
Irregular gaps and complex penetrations require layered approaches combining multiple materials for complete exclusion. These situations commonly occur around utility penetrations, foundation irregularities, and areas where different building materials meet.
Assessment of gap complexity considers depth, width variation, accessibility angles, and presence of moving parts like pipes or cables. Gaps deeper than 1/2 inch require backing material to provide proper sealant support and prevent over-application of expensive exclusion materials.
Material combination strategies layer chew-resistant materials with weather-resistant sealants for optimal performance. Install copper mesh or steel wool first to fill the majority of gap volume, then apply appropriate caulk or sealant to create complete environmental seal. Allow each layer to cure properly before applying subsequent layers.
Working with moving parts requires flexible sealants that maintain integrity despite thermal expansion, vibration, or slight movement. Use high-grade silicone sealants rated for structural movement, and avoid rigid materials that may crack or separate from moving components.
Seasonal Maintenance and Monitoring: Preventing Re-Entry
Even perfect exclusion work requires seasonal maintenance as houses settle, weather changes, and new vulnerabilities develop. Understanding seasonal vulnerability patterns helps homeowners focus maintenance efforts when they’re most needed.
Spring inspection checklists should focus on winter weather damage including freeze-thaw cycle effects on sealants, ice damage to gutters and roof areas, and ground settling that may have affected foundation seals. Examine all previously sealed entry points for signs of material degradation, cracking, or displacement. According to maintenance data, 15-20% of exclusion materials require touch-up or replacement after severe winter weather.
Fall preparation before peak mouse invasion season represents the most critical maintenance period. Mice actively seek winter shelter locations from September through November, making this the optimal time for comprehensive inspection and preventive sealing. Focus on areas that may have developed new gaps during summer expansion cycles.
Monthly monitoring involves visual inspection of high-priority areas including garage doors, basement entrances, and previously identified problem areas. Look for fresh mouse signs including droppings, gnaw marks, or disturbed exclusion materials. Establish monitoring stations with flour or baby powder near potential entry points to detect new activity.
Material degradation timelines help predict when replacements become necessary. Steel wool typically requires replacement after 12-18 months in outdoor applications, while copper mesh lasts 24-36 months. Weather-exposed sealants generally require renewal every 3-5 years depending on climate conditions and UV exposure levels.
Signs Your DIY Exclusion Is Failing
Early detection of exclusion failure prevents minor gaps from becoming major infestations. Regular monitoring for specific failure indicators allows prompt remediation before mouse populations establish breeding territories.
Physical signs of exclusion material failure include cracking, separation, or displacement of sealants, corrosion or deterioration of metal mesh materials, and gaps appearing around previously sealed areas. Fresh gnaw marks on or near exclusion materials indicate mice are testing sealed areas for weakness.
New mouse activity indicators include fresh droppings near previously sealed entry points, new grease marks on walls or baseboards, scratching sounds in walls during evening hours, and food package damage in areas that were previously mouse-free. Seasonal vulnerability changes occur as temperature fluctuations cause building materials to expand and contract, potentially opening new gaps or enlarging existing ones.
Troubleshooting Failed Exclusion Attempts: Why Mice Keep Getting In
When mice continue appearing despite your exclusion efforts, systematic troubleshooting reveals the gaps in your strategy. Understanding common failure patterns helps identify overlooked entry points and material application errors.
Most common exclusion failure points include incomplete sealing around utility penetrations, missed secondary entry points within 6-8 feet of sealed primary entrances, and material degradation in high-moisture environments. According to pest control industry data, 45% of failed exclusion attempts result from sealing obvious entry points while missing less visible access routes nearby.
Hidden entry points frequently missed during initial inspection include gaps behind appliances, openings concealed by landscaping or stored items, interior wall penetrations that connect to exterior access points, and upper-level access points requiring ladder inspection. I’ve discovered that mice often use complex route systems involving multiple entry and exit points that casual inspections don’t reveal.
Material failure patterns show predictable degradation based on environmental exposure and installation quality. Poor surface preparation causes 40% of premature sealant failures, while exposure to moisture and temperature extremes accelerates degradation of all exclusion materials. Using inappropriate materials for specific applications (like standard expanding foam instead of chew-resistant formulations) typically fails within 2-4 weeks.
Mouse behavior adaptation occurs when partial exclusion forces mice to find alternative routes. Sealing some but not all entry points often redirects mouse traffic to previously unused areas rather than eliminating access entirely. Understanding what attracts mice to your home helps address the root causes that make exclusion efforts more challenging.
When Mice Find New Entry Points After Sealing
Mice are persistent and will test new areas when familiar routes are blocked – anticipating this behavior prevents frustration and guides strategic exclusion approaches. Understanding mouse territorial behavior helps predict where new activity may occur.
Mouse exploration patterns after exclusion show systematic testing of areas within 10-15 feet of blocked routes. They follow existing scent trails and test similar structural features in nearby locations. Preventive sealing of potential future entry points involves identifying and addressing vulnerable areas before mice discover them.
Monitoring techniques for new activity include placing monitoring stations with tracking powder, setting up motion-activated cameras near potential entry points, and conducting weekly inspections of previously unmonitored areas. Strategic sequencing of exclusion work involves sealing all identified entry points simultaneously rather than piecemeal approaches that redirect rather than eliminate access.
Understanding mouse territory and travel patterns reveals why partial exclusion often fails. Mice typically maintain multiple escape routes and will establish new ones when primary routes are blocked. Complete exclusion requires addressing the entire perimeter rather than focusing only on areas with obvious activity.
Cost Analysis: DIY Exclusion vs. Professional Services
Understanding the true cost of DIY exclusion versus professional services helps homeowners make informed decisions based on their situation. Total cost analysis includes materials, tools, time investment, and long-term effectiveness considerations.
Material costs for typical home exclusion projects range from $75-200 for basic sealing supplies including steel wool, caulk, and expanding foam. Professional-grade materials including copper mesh and hardware cloth increase costs to $150-400 depending on home size and number of entry points. Tool investment requirements add $50-150 for basic inspection equipment or $200-500 for professional-grade tools including borescopes and specialized applicators.
Time investment for thorough DIY exclusion typically requires 8-16 hours spread over multiple days for proper inspection, material preparation, and application. Professional services complete exclusion work in 4-6 hours but charge $300-800 for comprehensive exclusion depending on home size and complexity.
Long-term cost implications favor professional services when DIY attempts fail and require repeated material purchases and additional time investment. Professional warranties typically cover exclusion work for 6-12 months, while DIY efforts often require seasonal maintenance and material replacement. When DIY approaches prove insufficient, subsequent professional services may cost 25-50% more due to remediation requirements.
Integration with Natural Pest Management: Beyond Exclusion
Exclusion works best as part of a comprehensive natural pest management strategy that addresses attraction, access, and habitat modification. Integrated natural pest control approaches provide more sustainable results than exclusion alone.
Habitat modification to reduce mouse attraction includes eliminating shelter areas like brush piles, wood stacks, and overgrown vegetation within 25 feet of home foundations. Remove food sources by properly storing pet food, birdseed, and garbage in sealed containers. Address moisture problems that create favorable mouse environments including leaky pipes, poor drainage, and excessive humidity in basements or crawl spaces.
Natural deterrents that complement exclusion efforts include peppermint oil applications around potential entry points, ultrasonic devices in areas with confirmed mouse activity, and predator scent markers that discourage mouse establishment in treated areas. These methods work best when combined with physical exclusion rather than as standalone solutions.
Landscape changes that reduce mouse populations include maintaining 3-foot vegetation-free zones around home foundations, removing bird feeders that create spillage attractive to mice, and installing gravel barriers that discourage burrowing near foundation walls. Beneficial predator encouragement through owl boxes, raptor perches, and snake habitat preservation provides natural population control in rural and suburban settings.
Integration with overall home pest management creates synergistic effects where exclusion, deterrents, and habitat modification work together for comprehensive protection. This holistic approach addresses the root causes that make homes attractive to mice while providing multiple barriers to successful establishment.
Frequently Asked Questions About Mouse Entry Point Exclusion
How small of a hole can a mouse squeeze through?
Mice can squeeze through any opening larger than 1/4 inch (6mm) in diameter – approximately the size of a dime. Their flexible cartilaginous skulls compress to match their ribcage diameter, which represents their smallest rigid body dimension. According to research from the University of Nebraska-Lincoln, mice can compress their skulls by up to 50% of normal width during passage through tight spaces. This remarkable flexibility means openings that appear too small for mice often provide easy access.
What materials can mice NOT chew through for permanent exclusion?
Mice cannot chew through properly installed steel wool (coarse grade), copper mesh, or 1/4-inch hardware cloth made from 19-gauge galvanized steel wire. These materials have hardness ratings and wire diameters that exceed mouse gnawing capabilities. Materials testing shows hardware cloth provides permanent exclusion for 10+ years, while copper mesh lasts 24-36 months and steel wool provides 12-18 months of protection before requiring replacement. Standard materials mice can chew through include wood, rubber, plastic, aluminum screening, and standard expanding foam.
Should I seal entry points if mice are still inside my house?
Never seal entry points while mice are still inside – this traps them and creates worse problems including death odors, increased property damage, and desperate escape attempts through new areas. Eliminate existing mouse populations first using humane removal methods, then wait 5-7 days after the last signs of activity before beginning exclusion work. Trapped mice will chew through walls, insulation, and other building materials in attempts to escape, potentially causing thousands of dollars in damage.
How do I know if an entry point is actively being used by mice?
Active entry points show fresh gnaw marks with light-colored wood shavings, dark grease marks from mouse fur contact, small black droppings (rice-grain sized), and strong ammonia odors from urine concentration. Fresh activity creates shiny wear patterns on surfaces where mice repeatedly travel, and you may observe actual mouse traffic during evening hours. Inactive entry points show weathered gnaw marks, old droppings that crumble when touched, and absence of fresh odors or grease marks.
What time of year is most critical for sealing mouse entry points?
Late summer and early fall (August-October) are critical times for exclusion before winter invasion season. Mice actively seek winter shelter during this period, with entry point usage increasing by 300% according to pest control industry data. Fall exclusion prevents establishment of breeding populations that reproduce throughout winter months. Spring exclusion (March-April) addresses winter weather damage to previous sealing work but occurs after peak invasion periods.
Can I use expanding foam alone to seal mouse entry points permanently?
Expanding foam alone is not sufficient – mice can chew through most foam products within 2-4 weeks. Standard expanding foams provide temporary solutions only and should be combined with chew-resistant materials like steel wool or copper mesh for permanent exclusion. Pest-control-specific expanding foams include bittering agents that discourage gnawing but still require backing with metal mesh for long-term effectiveness. Use foam as a secondary sealant over chew-resistant base materials, not as primary exclusion material.
How often should I re-inspect sealed entry points for maintenance?
Inspect sealed entry points every 3-6 months during routine seasonal maintenance, with comprehensive annual inspections before peak mouse season (late summer). Weather exposure, building settlement, and material aging require periodic verification of seal integrity. Monthly spot-checks of high-priority areas like garage doors and basement entrances help detect problems early. Material replacement schedules vary: steel wool every 12-18 months, copper mesh every 24-36 months, and sealants every 3-5 years depending on environmental exposure.
What’s the biggest mistake homeowners make when sealing entry points?
The biggest mistake is sealing obvious holes while missing less visible entry points nearby, creating incomplete exclusion that redirects rather than eliminates mouse access. According to pest control data, 45% of failed exclusion attempts result from this partial approach. Mice will test alternative routes within 6-8 feet of blocked entrances, often finding secondary access points that casual inspections miss. Other common mistakes include using inappropriate materials, inadequate surface preparation, and sealing entry points while mice remain inside the structure.
Do electronic repellents work instead of physical exclusion?
Electronic repellents are not effective substitutes for physical exclusion methods. Federal Trade Commission testing found insufficient evidence supporting ultrasonic device effectiveness, and mice quickly habituate to constant sound frequencies. Research from Kansas State University showed no significant reduction in mouse activity when ultrasonic devices were used alone. Electronic repellents may provide temporary supplemental deterrent effects but cannot replace comprehensive physical exclusion for permanent mouse control.
How do I seal entry points around pipes and utility lines?
Utility penetrations require flexible sealing methods that accommodate expansion and movement while providing complete exclusion. Install copper mesh or steel wool around the entire pipe circumference, leaving space for thermal expansion. Apply high-grade silicone sealant rated for structural movement over the mesh to create weather-tight seals. For gas lines, use only approved sealants specified by local building codes. Avoid rigid materials that may crack with pipe movement or building settlement. Inspect utility penetrations annually as these areas commonly develop gaps due to vibration and thermal cycling.