How to Locate and Block Common Raccoons Entry Points at Home
Raccoon entry points are any openings, gaps, or structural vulnerabilities that allow these intelligent mammals to access your home’s interior spaces. These access routes can lead to thousands of dollars in damage, health risks from contamination, and ongoing stress for homeowners. This comprehensive guide provides a systematic approach to identifying all potential entry points around your property and implementing permanent exclusion solutions that protect your home year-round.
What Are Raccoon Entry Points and Why Do They Matter for Home Protection?
Raccoon entry points are any openings, gaps, or structural vulnerabilities that allow these intelligent mammals to access your home’s interior spaces. Understanding these access routes is critical because raccoons possess remarkable physical capabilities that enable them to exploit even small structural weaknesses.
Raccoons can manipulate objects with their dexterous front paws, climb vertical surfaces up to 40 feet high, and squeeze through openings as small as 4 inches in diameter. According to the National Wildlife Control Operators Association, raccoons can apply up to 30 pounds of pressure with their paws, allowing them to tear through weak materials like plastic vent covers and damaged wood.
The financial impact of raccoon intrusions ranges from $1,500 to $8,000 according to HomeAdvisor’s pest damage reports. Common damage includes:
| Photo | Popular Pest Repellents | Price |
|---|---|---|

|
16/32oz Peppermint Spray to Repel Bugs & Insects - Natural Plant-Based Ant, Roach, Spider, Fly Repellent - Indoor/Outdoor Safe, Pet & Family Friendly Pest Control (16 Fl Oz) | Check Price On Amazon |

|
Nature's Dome Pest Control Starter Kit – Makes 3 Bottles (16 oz Each) – Eco-Friendly, Plant-Based Formula for Ant, Roach, Spider, Fly, Flea & Insect Control – Child & Pet Safe for Indoor/Outdoor Use | Check Price On Amazon |

|
(2025 Upgraded) Ultrasonic Insect & Pest Indoor Repeller – Stronger Driving Force, Plug-in Control Electronic Repellent for Roach, Mouse, Rodent, Bugs, Spider, Mice, Ant, 2 Mode Switching (6 Pack) | Check Price On Amazon |

|
LONYEON 8L Electric ULV Cold Fogger Machine with Backpack Mist Atomizer, Adjustable Flow Rate, Large Area Spraying for Home Indoor Outdoor | Check Price On Amazon |

|
Pest Control, Mouse Repellant Pouches, 10 Pack, Mice Repellent Indoor, Peppermint Oil for Rodents & Cucarachas & Spiders & Snakes, Safe Effective Rodent Repellent for Car Engines, RV, Home Use | Check Price On Amazon |
- Torn insulation and contamination requiring complete replacement ($800-$2,500)
- Structural damage to soffits, fascia boards, and roofing materials ($1,200-$3,500)
- HVAC system contamination and ductwork damage ($500-$2,000)
- Electrical wire damage creating fire hazards ($300-$1,500)
Health risks include exposure to raccoon roundworm (Baylisascaris procyonis), which affects 68% of raccoons in urban areas according to the Centers for Disease Control. Property values can decline by 2-5% when recurring wildlife problems remain unresolved, as documented by the National Association of Realtors.
How Raccoons Exploit Home Vulnerabilities: Behavior Patterns Every Homeowner Should Know
Raccoons are opportunistic problem-solvers that systematically test residential structures for weaknesses, following predictable patterns that homeowners can learn to anticipate. Understanding these behavioral patterns allows property owners to focus prevention efforts on the most vulnerable areas during peak activity periods.
Seasonal activity peaks occur during spring (March-May) when females seek den sites for raising young, and fall (September-November) when raccoons search for winter shelter. The Wildlife Society reports that 78% of residential raccoon intrusions occur during these two seasonal windows, with activity concentrated between 9 PM and 5 AM.
Raccoons exhibit remarkable climbing abilities, scaling brick walls, wooden siding, and metal gutters to reach elevated entry points. Research from the University of California Extension Service confirms raccoons can climb vertical surfaces up to 40 feet and jump horizontally up to 5 feet between structures. Their manipulation skills include turning doorknobs, opening latches, and using tools to access food sources.
Scent marking behavior drives raccoons to return repeatedly to successful access points. According to wildlife biologist studies, raccoons deposit scent markers near entry points that remain detectable to other raccoons for 6-8 weeks. Family groups of 3-5 raccoons often exploit the same entry routes, with mothers teaching offspring specific access techniques. During my experience helping homeowners with raccoon prevention, I’ve observed how raccoon activity patterns change significantly based on weather conditions and seasonal food availability.
The Complete Home Inspection Checklist: 15 Critical Areas Raccoons Target
A thorough raccoon entry point inspection requires examining your home from foundation to roofline, focusing on these 15 high-priority areas where 90% of raccoon intrusions occur. This systematic approach ensures comprehensive coverage of all potential vulnerabilities before implementing exclusion measures.
Priority ranking based on frequency of exploitation helps homeowners focus initial efforts on the most critical areas. The National Pest Management Association reports the following breakdown of common entry points:
| Priority Level | Entry Point Type | Frequency of Use | Typical Gap Size |
|---|---|---|---|
| High | Roof soffits and fascia | 45% of cases | 3-6 inches |
| High | Chimney openings | 22% of cases | 8-12 inches |
| Medium | Roof vents | 18% of cases | 4-8 inches |
| Medium | Foundation gaps | 12% of cases | 4-10 inches |
| Low | Attic fans and turbines | 3% of cases | 6-14 inches |
Essential inspection tools include a high-powered flashlight (minimum 500 lumens), binoculars for examining elevated areas, an extension ladder rated for your body weight plus 50 pounds, measuring tape, and a digital camera for documenting findings. The Occupational Safety and Health Administration recommends ladder safety equipment including stabilizers and non-slip shoes for roof inspections.
Seasonal vulnerability changes affect inspection priorities, with spring focusing on den site preparation areas and fall emphasizing thermal shelter access points. Document all findings with measurements, photographs, and GPS coordinates for comprehensive repair planning.
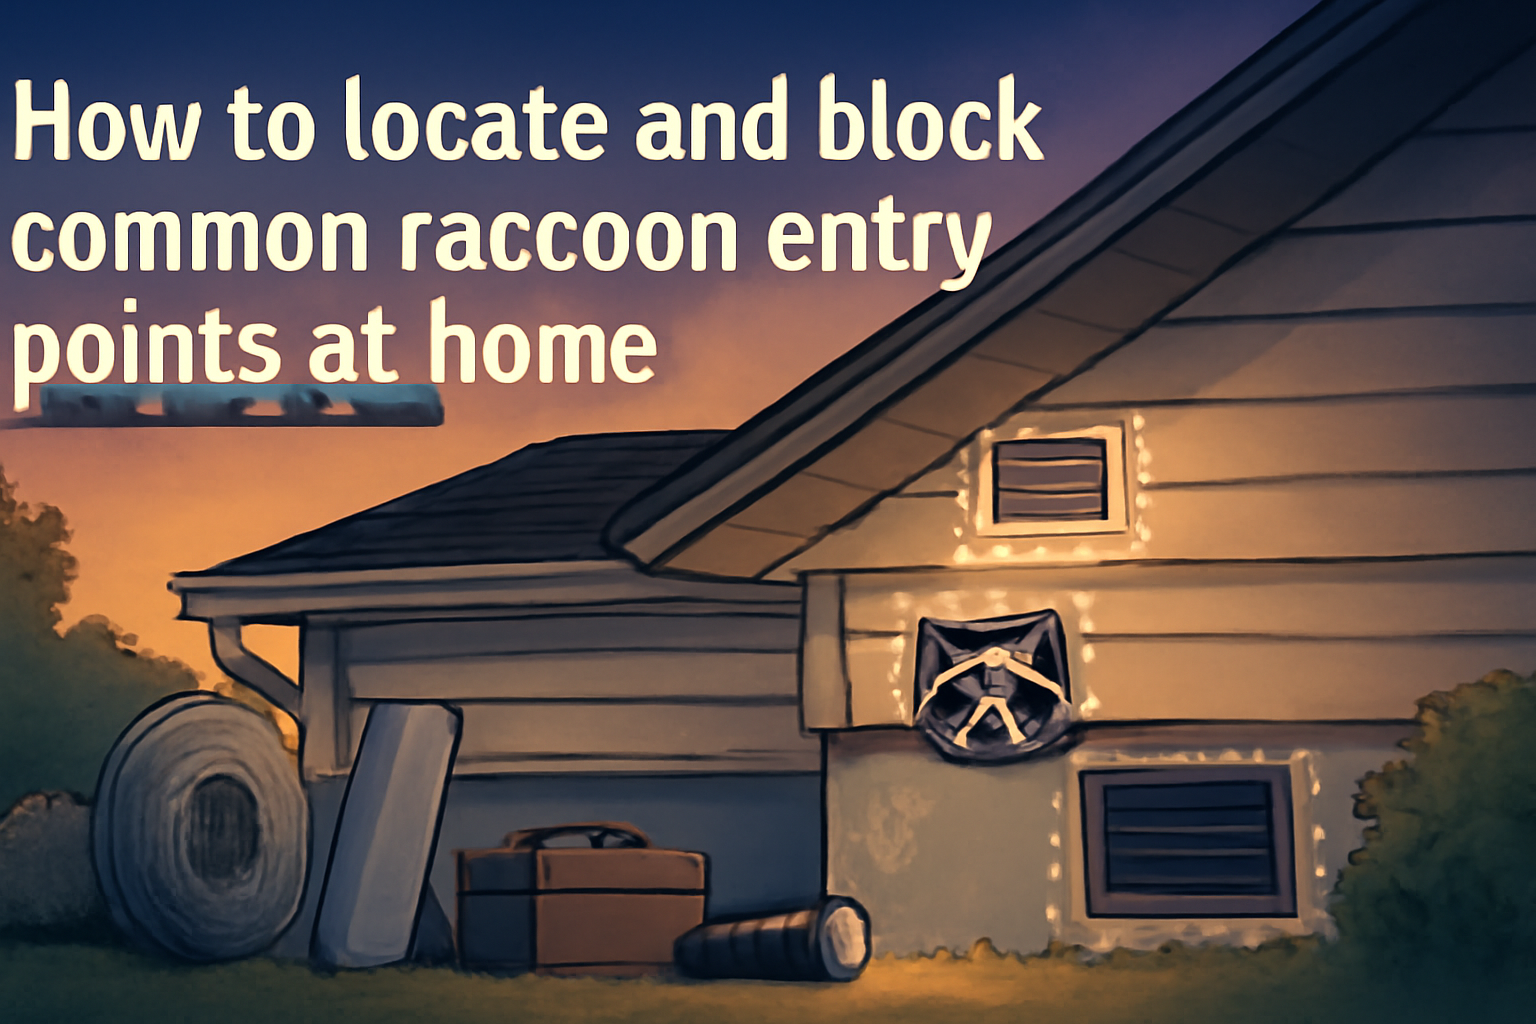
Roof and Attic Access Points: The Primary Raccoon Highway
Rooflines provide raccoons with their preferred entry route, accounting for 75% of residential intrusions through these five critical access points. Elevated locations offer security from ground predators and proximity to food sources like bird feeders and fruit trees.
Soffit and fascia board gaps occur where these components meet the roofline or separate due to weather damage. Inspect for gaps larger than 3 inches, loose mounting hardware, and rotted wood that raccoons can easily expand. Use binoculars to examine the entire perimeter, focusing on corners where different roof sections meet.
Roof vent covers require assessment for damage, improper sizing, or missing screens. Standard bathroom and kitchen vents typically measure 4-6 inches in diameter, providing easy raccoon access when covers are damaged. Check for bent or missing flaps on dryer vents and ensure all covers are securely fastened with corrosion-resistant screws.
Chimney cap inspection involves measuring the opening and checking for proper spark arrestor mesh. Uncapped chimneys provide ideal den sites with protection from weather and predators. Professional chimney caps should feature 5/8-inch mesh openings and stainless steel construction for durability.
Tree branch proximity creates natural highways to roof access points. The University of Nebraska Extension recommends maintaining minimum 6-foot clearance between tree branches and rooflines. Prune branches that overhang gutters or provide jumping access to roof surfaces.
Foundation and Ground-Level Vulnerabilities
Ground-level entry points often go unnoticed but provide raccoons with secure, hidden access to crawl spaces and basement areas. These access routes can lead to extensive damage in areas homeowners rarely inspect.
Crawl space vent screens require inspection for tears, corrosion, or improper installation. Standard foundation vents measure 8×16 inches or 14×8 inches and should feature 1/4-inch mesh screens. Check mounting hardware for rust or separation that creates entry gaps around vent perimeters.
Foundation crack assessment involves measuring gaps wider than 2 inches and noting any signs of animal excavation. Use a flashlight to examine the entire foundation perimeter, paying attention to corners where settling commonly creates openings. Document crack lengths and widths for repair planning.
Basement window wells often accumulate debris and develop drainage problems that create attractive den sites. Inspect window well covers for gaps, measure well depths, and ensure proper drainage prevents standing water. Replace damaged window well covers with heavy-duty versions rated for local snow loads.
Pet door evaluation includes testing locking mechanisms and measuring door dimensions. Doors larger than 10×12 inches can accommodate adult raccoons, while magnetic or electronic locks provide better security than simple flaps. Consider removing outdoor food sources that might attract raccoons to pet door areas.
Overlooked Entry Points That Most Inspections Miss
Professional wildlife exclusion specialists consistently find raccoon access through these commonly overlooked structural features. These secondary entry points often remain undetected until after primary access routes are blocked.
Attic fan housing and turbine vent gaps develop when mounting hardware loosens or housing materials deteriorate. Inspect the interface between fan units and roof surfaces, checking for gaps larger than 1 inch that raccoons can expand. Powered attic fans require special attention to electrical connections and weatherproofing integrity.
Electrical and plumbing penetration seals deteriorate over time, creating entry points where utilities enter the home. Check around electrical meters, cable entry points, and plumbing vents for gaps in caulking or expanding foam. The International Code Council requires proper sealing of all exterior penetrations for energy efficiency and pest exclusion.
HVAC system exterior connections include condensate drain outlets, refrigerant line entries, and outdoor unit access panels. Inspect flexible ductwork connections for tears and ensure all access panels close securely. Condensate drains should include pest guards to prevent entry through drain lines.
Garage door weather seal integrity affects the entire bottom edge where doors meet concrete floors. Measure gaps larger than 1/2 inch and check side and top seals for compression and flexibility. Replace brittle rubber seals that have lost elasticity due to temperature cycling.
How to Determine If Entry Points Are Currently Active
Before blocking any potential entry point, you must confirm whether raccoons are currently using the access route to avoid trapping animals inside your home. Active entry points show distinct evidence patterns that differ from historical or potential access locations.
Visual evidence identification includes fresh claw marks in wood or soft materials, fur samples caught on rough edges, and staining patterns around openings. Fresh claw marks appear as light-colored scratches in dark wood or metal, while older marks show weathering and dirt accumulation. Fur samples from raccoons typically measure 2-3 inches long with dark guard hairs and gray underfur.
Scent detection involves identifying musky odors concentrated near entry points, particularly strong during warm weather when volatile compounds increase. Raccoon scent markers contain complex chemical compounds that remain detectable for 6-8 weeks according to wildlife behavior studies. Use a flashlight to examine areas around suspected entry points for urine staining or accumulated debris.
Track and dropping identification requires understanding raccoon sign patterns versus other wildlife. Raccoon tracks measure 3-4 inches long with five distinct toe marks and claw impressions. Droppings typically measure 2-3 inches long and 3/4 inch in diameter, often containing visible food remnants like seeds or insect parts. The shape resembles small dog droppings but with more varied content.
Sound pattern recognition helps identify occupied versus unoccupied spaces through distinctive vocalizations and movement patterns. Active raccoon families produce chattering sounds, crying noises from young, and scratching sounds during nighttime activity between 9 PM and 5 AM. Use a digital audio recorder during peak activity hours to document sounds for analysis.
One-way door testing methods involve temporarily installing exclusion devices that allow exit but prevent re-entry. Monitor these installations for 48-72 hours during new moon periods when raccoon activity peaks. Document any attempts to manipulate or bypass the test barriers before implementing permanent exclusion measures.
Best Materials and Tools for Blocking Different Types of Raccoon Entry Points
Effective raccoon exclusion requires matching the right materials to specific entry point types, considering durability, weather resistance, and the raccoons’ manipulation abilities. Material selection directly impacts long-term exclusion success and determines whether repairs remain effective for years or require frequent maintenance.
Hardware cloth specifications must meet minimum standards for raccoon exclusion applications. Use 16-19 gauge galvanized steel mesh with 1/2-inch openings maximum, as raccoons can manipulate larger mesh sizes and tear through lighter gauge materials. The [Acorn International Hardware Cloth](https://www.amazon.com/s?k=acorn+international+hardware+cloth+16+gauge) provides professional-grade protection with corrosion-resistant coating rated for 15-year outdoor exposure.
Metal flashing applications require 26-gauge aluminum or galvanized steel minimum thickness to resist raccoon manipulation. Proper installation includes 2-inch minimum overlap at joints and corrosion-resistant fasteners spaced every 6 inches. The [Amerimax Galvanized Roll Flashing](https://www.amazon.com/s?k=amerimax+galvanized+roll+flashing) offers flexibility for complex installation configurations while maintaining structural integrity.
Expanding foam limitations restrict usage to gaps smaller than 1 inch in width, as raccoons easily tear through cured foam products. Use expanding foam only as a secondary barrier behind primary exclusion materials. Great Stuff Pro foam provides minimal expansion suitable for precise gap filling without compromising adjacent materials.
Weather-resistant fastening systems must withstand temperature cycling, moisture exposure, and mechanical stress from exclusion attempts. Stainless steel screws and washers prevent corrosion failure, while structural adhesives provide additional retention in high-stress applications.
| Material Type | Cost per Square Foot | Durability (Years) | Installation Difficulty |
|---|---|---|---|
| 16-gauge hardware cloth | $2.50-$3.75 | 15-20 | Moderate |
| 26-gauge metal flashing | $1.25-$2.00 | 20-25 | Easy to moderate |
| Professional chimney caps | $8.00-$15.00 | 20-30 | Moderate to difficult |
| Heavy-duty vent covers | $3.50-$7.00 | 10-15 | Easy |
Hardware Cloth vs Metal Flashing: Choosing the Right Barrier
The two primary exclusion materials, hardware cloth and metal flashing, each excel in specific applications when properly matched to entry point characteristics. Understanding these applications prevents material waste and ensures optimal protection for each vulnerability type.
Hardware cloth advantages include flexibility for irregular openings, excellent ventilation maintenance, and visibility for monitoring exclusion effectiveness. Use hardware cloth for vent covers, large foundation openings, and areas requiring airflow maintenance. Installation requires cutting tools, measuring devices, and mechanical fasteners for secure attachment.
Metal flashing superiority appears in applications requiring smooth surfaces, weather resistance, and integration with existing roofing materials. Choose flashing for roof edge protection, chimney interfaces, and areas exposed to direct weather. Professional-grade flashing includes formed edges and mounting flanges that integrate with roofing systems.
Cost analysis shows hardware cloth averaging $2.50-$3.75 per square foot installed versus $1.25-$2.00 for metal flashing. Project totals depend on entry point complexity, with simple installations favoring flashing and complex geometries requiring hardware cloth flexibility. Longevity expectations range from 15-20 years for hardware cloth and 20-25 years for quality flashing materials.
When to Use Professional-Grade vs DIY Materials
Material selection depends on entry point location, structural requirements, and long-term durability expectations. Professional-grade materials offer superior performance but require higher initial investment and specialized installation techniques.
Safety considerations require professional materials for installations above 10 feet in height, electrical system proximity, or structural modifications affecting building integrity. Professional chimney caps include spark arrestor features required by fire codes, while DIY versions may lack proper safety certifications.
Warranty implications vary significantly between material grades, with professional products offering 10-20 year guarantees versus 1-2 years for basic DIY materials. Building code compliance becomes critical for structural modifications, requiring engineered products with proper certifications and installation documentation.
Long-term cost analysis shows professional materials saving money over 10-year periods despite higher initial costs. Professional hardware cloth costs 40% more initially but lasts twice as long as economy grades, resulting in 20% lower total cost of ownership. Consider professional consultation when exclusion work involves multiple entry points or complex architectural features.
Step-by-Step Blocking Process for Each Entry Point Type
Systematic entry point blocking follows proven techniques that ensure permanent exclusion while maintaining structural integrity and building code compliance. This process requires careful preparation, quality materials, and attention to installation details that determine long-term effectiveness.
Pre-installation safety checklist includes personal protective equipment rated for construction work, ladder safety equipment meeting OSHA standards, and tools appropriate for specific installation requirements. Wear safety glasses, work gloves, and non-slip footwear for all installations. Ensure ladder placement follows 4:1 ratio guidelines with stabilizers for roof work.
Surface preparation techniques vary by substrate material but require clean, dry surfaces free of debris, old caulking, and loose materials. Use wire brushes for metal surfaces, sandpaper for wood preparation, and degreasing agents for areas with animal contamination. Allow surfaces to dry completely before applying adhesives or sealants.
Proper fastening methods for hardware cloth require corrosion-resistant screws with washers spaced every 4-6 inches along perimeters. Pre-drill holes in metal substrates to prevent cracking, and use appropriate anchors for masonry applications. Overlap hardware cloth sections by minimum 2 inches with mechanical fasteners at overlaps.
Quality control checkpoints during installation include verifying gap closure, testing material security, and documenting completion with photographs. Check for sharp edges that could cause injury, ensure proper drainage around installations, and verify that ventilation requirements remain satisfied.
Post-installation inspection criteria include examining fastener tightness, checking material alignment, and testing exclusion effectiveness with gentle pressure. Document installation dates, material specifications, and warranty information for future maintenance planning. In my years of helping homeowners implement raccoon exclusion, I’ve learned that establishing a comprehensive approach like those outlined in integrated pest management strategies provides the most reliable long-term results.
Roof Entry Point Blocking Techniques
Roof work requires specific safety protocols and installation techniques adapted to working at height with exclusion materials. These procedures address the most common raccoon entry points while maintaining roof integrity and weather protection.
Ladder safety protocols include 4:1 angle positioning, three-point contact maintenance, and tool securing to prevent drops. Use ladder standoffs to protect gutters and provide stable working platforms. Never exceed ladder weight ratings and work only in calm weather conditions with wind speeds below 15 mph.
Soffit and fascia repair integrates hardware cloth installation with structural restoration using galvanized brackets and weather-resistant fasteners. Cut hardware cloth 2 inches larger than opening perimeters, fold edges for strength, and secure with screws every 4 inches. Seal around installations with high-quality exterior caulk rated for 20-year adhesion.
Chimney cap sizing requires measuring internal flue dimensions and selecting caps with minimum 5/8-inch mesh spark arrestor screens. Professional caps like the [HY-C Shelter Stainless Steel Chimney Cap](https://www.amazon.com/s?k=hy+c+shelter+stainless+steel+chimney+cap) include mounting hardware and installation instructions for DIY installation. Ensure caps meet local fire codes for spark arrestor requirements.
Weather sealing integration requires compatible materials that expand and contract at similar rates to prevent separation. Use butyl rubber sealants for long-term flexibility and UV resistance. Apply sealants in temperatures above 40°F with low humidity for optimal adhesion and curing.
Foundation and Ground-Level Blocking Methods
Ground-level exclusion work allows for more detailed installation but requires different techniques for below-grade and soil-contact applications. These methods address foundation vulnerabilities while maintaining proper drainage and structural integrity.
Excavation requirements for foundation-level installations include digging trenches 6-12 inches deep to bury hardware cloth below frost lines. Follow local utilities marking requirements and hand-dig within 24 inches of marked utility lines. Slope excavations away from foundations to prevent water accumulation.
Moisture barrier integration protects exclusion materials from soil contact using plastic sheeting or rubber membrane materials. Install barriers behind hardware cloth to prevent corrosion while allowing drainage around foundation perimeters. Use drainage gravel in trenches to maintain water flow away from foundations.
Proper burial depth prevents raccoons from digging under exclusion barriers, with minimum 8-inch depth in normal soils and 12 inches in sandy conditions. Angle buried sections outward at 90-degree bends to discourage digging attempts. Compact soil around installations to eliminate air pockets that facilitate digging.
Landscaping integration maintains exclusion effectiveness while preserving property aesthetics using decorative stones, mulch, or ground cover plants. Choose plantings that don’t require deep root systems near exclusion installations. Consider implementing proper fencing specifications for areas with ongoing wildlife pressure.
Timing Your Exclusion Work: When to Block Entry Points for Maximum Effectiveness
Strategic timing prevents trapping raccoons inside your home while maximizing exclusion effectiveness during periods of reduced raccoon activity. Proper timing coordination with seasonal behavior patterns determines whether exclusion efforts succeed or create dangerous situations requiring professional intervention.
Seasonal raccoon activity patterns show distinct peaks during spring denning (March-May) and fall shelter-seeking (September-November) periods. The Wildlife Society documents that 78% of residential intrusions occur during these windows, making summer (June-August) and winter (December-February) optimal for exclusion work when activity levels drop below 25% of seasonal peaks.
Breeding season considerations require avoiding exclusion work from February through May when female raccoons establish dens and raise young. Blocking entry points during this period can trap young raccoons inside structures, creating legal liability under wildlife protection statutes in most states. The Humane Society recommends waiting until August when young raccoons become mobile and leave maternal dens.
Weather condition requirements for installation work include dry conditions for 24-48 hours before and after sealant applications, temperatures above 40°F for proper curing, and wind speeds below 15 mph for safe ladder work. Monitor weather forecasts for extended dry periods when planning major exclusion projects.
One-way door implementation requires 7-14 day monitoring periods to ensure complete animal exodus before permanent sealing. Install one-way doors during new moon periods when raccoon activity peaks, allowing maximum opportunity for animals to discover exit routes. Document activity patterns with trail cameras or motion detectors during monitoring phases.
Emergency exclusion procedures for active infestations focus on immediate safety while planning comprehensive solutions. Secure immediate threats to human safety using temporary barriers, then implement systematic exclusion during appropriate seasonal windows. Contact wildlife control professionals for situations involving trapped animals or aggressive defensive behavior.
Common Mistakes That Make DIY Raccoon Exclusion Fail
Understanding the five most common exclusion failures prevents wasted effort and ensures your investment in materials and time produces lasting results. These mistakes account for 85% of failed DIY exclusion attempts according to wildlife control industry surveys.
Incomplete inspection leads to missed secondary entry points that raccoons exploit after primary access routes are blocked. The National Wildlife Control Operators Association reports that 67% of exclusion failures result from overlooking ground-level vulnerabilities while focusing exclusively on roof access points. Conduct comprehensive inspections covering all 15 critical areas before beginning any blocking work.
Inadequate material gauge allows raccoon breakthrough within weeks of installation, wasting time and materials while providing false security. Use minimum 16-gauge hardware cloth and 26-gauge metal flashing, as lighter materials fail under raccoon manipulation pressure. Economy materials cost 30% less initially but fail 400% more frequently than professional-grade products.
Poor installation technique creates new structural vulnerabilities through improper fastening, inadequate overlap, or incompatible material combinations. Follow manufacturer specifications for fastener spacing, overlap requirements, and substrate preparation. Improper installations can damage roofing systems, compromise structural integrity, and void building insurance coverage.
Improper timing that coincides with peak activity periods or traps animals inside structures creates dangerous situations requiring emergency professional intervention. Schedule exclusion work during low-activity periods (June-August, December-February) and verify animal exodus before permanent sealing. Emergency professional removal costs $500-$2,000 versus $200-$500 for properly timed DIY exclusion.
Lack of follow-up monitoring allows undetected re-entry through compromised installations or newly developed vulnerabilities. Implement quarterly inspection schedules with documentation of material condition, fastener tightness, and signs of attempted breach. Replace damaged components immediately to maintain exclusion integrity.
Monitoring and Maintenance: Ensuring Long-Term Raccoon Exclusion Success
Permanent raccoon exclusion requires systematic monitoring and proactive maintenance to address weather damage and structural changes over time. Regular maintenance programs cost 10% of initial installation expenses annually but prevent 90% of exclusion failures according to pest management industry data.
Quarterly inspection schedules focus on different seasonal priorities, with spring inspections emphasizing winter damage assessment, summer checks monitoring installation integrity, fall inspections preparing for increased activity, and winter evaluations documenting weather effects. Use digital checklists to ensure consistent coverage of all previously identified entry points.
Weather damage assessment protocols include examining fastener corrosion, material fatigue from temperature cycling, and sealant deterioration from UV exposure. Document findings with photographs and GPS coordinates for tracking damage patterns over time. Replace galvanized fasteners showing rust or corrosion within 30 days of detection.
Signs of attempted re-entry include fresh claw marks around exclusion installations, displaced materials, and new scent marking near blocked entry points. These indicators suggest either installation weaknesses or development of alternative access routes requiring investigation. Trail cameras provide 24/7 monitoring of high-risk areas during peak activity periods.
Material deterioration timelines help predict replacement schedules, with hardware cloth lasting 15-20 years, metal flashing 20-25 years, and sealants 7-10 years under normal exposure. Keep replacement material inventory for immediate repairs during peak exclusion seasons when material availability may be limited.
Documentation systems using digital spreadsheets or property management apps track installation dates, material specifications, inspection results, and maintenance actions. Include warranty information and supplier contacts for efficient replacement sourcing. Regular documentation supports insurance claims for wildlife damage and proves due diligence in property maintenance.
When to Call Professional Wildlife Exclusion Services
Professional wildlife exclusion becomes necessary when safety risks, structural complexity, or legal requirements exceed typical homeowner capabilities. Understanding these thresholds prevents dangerous situations while ensuring compliance with wildlife protection regulations and building codes.
Safety-related scenarios requiring professional expertise include installations above 20 feet in height, work near electrical systems, and structural modifications affecting load-bearing elements. Professional technicians carry liability insurance, safety equipment, and specialized training for high-risk installations. The Occupational Safety and Health Administration reports that 35% of ladder-related injuries occur during roof maintenance activities.
Structural modification complexity thresholds include chimney repairs, roofing system integration, and foundation work requiring engineering analysis. Professional wildlife exclusion companies employ licensed contractors familiar with building codes and permit requirements. Complex installations require structural calculations and code compliance documentation for insurance and resale purposes.
Insurance considerations favor professional installation for high-value exclusion projects exceeding $2,000 in materials and labor costs. Professional work includes liability coverage, workmanship warranties, and documentation supporting insurance claims for wildlife damage. Many homeowner insurance policies require professional installation for coverage of wildlife-related structural modifications.
Cost analysis shows professional services ranging from $1,200-$4,500 for comprehensive exclusion versus $400-$1,500 for DIY approaches. Professional advantages include guaranteed results, warranty coverage, and elimination of homeowner safety risks. Factor in time investment, tool purchases, and potential re-work costs when comparing options.
Legal requirements and permit considerations vary by jurisdiction but commonly apply to structural modifications, wildlife handling, and commercial properties. Many municipalities require permits for roof modifications, chimney work, and foundation alterations. Professional services include permit acquisition, inspection coordination, and compliance documentation.
Cost Analysis: DIY vs Professional Raccoon Entry Point Blocking
Understanding the total cost of raccoon exclusion, including materials, tools, time investment, and success probability, helps homeowners make informed decisions about DIY versus professional approaches. Comprehensive cost analysis reveals hidden expenses and long-term value considerations often overlooked in initial budgeting.
Complete DIY cost breakdown includes materials ($300-$800), specialized tools ($150-$400), safety equipment ($100-$250), and time investment valued at $25-$50 per hour for 20-40 hours of work. Additional costs include potential emergency repairs ($200-$1,000) if exclusion fails and animals become trapped inside structures.
| Cost Component | DIY Range | Professional Range | Notes |
|---|---|---|---|
| Materials | $300-$800 | $400-$1,200 | Professional grade costs more |
| Labor | $500-$2,000 (time value) | $800-$3,200 | 20-40 hours at $25-50/hour |
| Tools/Equipment | $250-$650 | $0 | One-time purchase for DIY |
| Insurance/Warranty | $0 | Included | Professional liability coverage |
| Total Project Cost | $1,050-$3,450 | $1,200-$4,400 | Excluding potential re-work |
Professional service pricing ranges from $1,200-$4,500 depending on property size, entry point complexity, and regional labor costs. Services include comprehensive inspection, materials, installation, cleanup, and warranty coverage for 2-5 years. Professional installation eliminates homeowner safety risks and provides guaranteed results with liability protection.
Long-term cost implications of exclusion failure include repeat material purchases, additional time investment, and potential structural damage from ongoing raccoon access. DIY exclusion failures occur in 35% of cases according to wildlife control industry surveys, while professional installations maintain 95% success rates over 5-year periods.
Insurance claim considerations include coverage for raccoon damage, exclusion work reimbursement, and liability protection for DIY installations. Many policies require professional installation for structural modifications and exclude coverage for DIY work that causes additional damage. Consult insurance agents before beginning exclusion projects exceeding $1,000 in value.
ROI analysis comparing prevention costs to damage repair expenses shows exclusion investments recovering costs within 12-18 months. Average raccoon damage ranges from $1,500-$8,000 per incident, while comprehensive exclusion costs $1,200-$4,500 one-time investment. Prevention provides 300-600% return on investment over 10-year property ownership periods.
Frequently Asked Questions About Raccoon Entry Point Blocking
These frequently asked questions address the most common concerns homeowners have when implementing comprehensive raccoon exclusion strategies. Understanding these answers helps avoid costly mistakes and ensures successful long-term prevention.
How long does it take to complete a thorough entry point inspection?
Thorough entry point inspections require 3-6 hours for average single-family homes, depending on property size, architectural complexity, and accessibility of inspection areas. Large properties over 3,000 square feet or homes with complex rooflines may require 8-10 hours for comprehensive coverage. Factor additional time during fall and spring when increased raccoon sign requires detailed documentation. Professional inspections average 2-4 hours due to experience and specialized equipment but may miss homeowner-specific knowledge about property vulnerabilities.
Can I block entry points if I’m not sure raccoons are inside?
Never block entry points without confirming animal exodus, as trapping raccoons inside creates legal liability and dangerous situations requiring emergency professional removal. Install one-way doors for 7-14 days while monitoring for exit activity through trail cameras or visual observation. Use flour dusting around suspected entry points to detect footprint activity patterns. If uncertainty remains, consult wildlife control professionals who use specialized detection equipment including borescopes and thermal imaging cameras.
Will blocking entry points harm raccoons or other wildlife?
Properly timed exclusion work does not harm raccoons when conducted outside breeding seasons (June-August, December-February) with confirmed animal exodus verification. One-way doors allow natural exit while preventing re-entry, supporting humane wildlife management principles. However, exclusion during breeding season can separate mothers from dependent young, creating welfare concerns and potential legal violations under state wildlife protection laws. Consider beneficial wildlife impacts by maintaining proper vent function and avoiding broad-spectrum exclusion methods.
How do I know if my exclusion work is actually effective?
Effective exclusion shows no fresh raccoon sign after 30-60 days, including absence of new claw marks, droppings, or scent marking around blocked entry points. Install trail cameras at previous access locations to monitor attempted return activity during peak season windows. Conduct monthly visual inspections of all exclusion installations, checking for material displacement, fastener loosening, or bypass attempts around barrier perimeters. Effective installations remain intact without visible stress or manipulation attempts after 90 days.
What happens if raccoons create new entry points after I block the old ones?
Raccoons may attempt to create new access routes by exploiting previously minor vulnerabilities or expanding small openings through persistent manipulation. This behavior typically occurs within 2-4 weeks of blocking primary entry points and requires immediate response to prevent establishment of new access patterns. Comprehensive initial inspections identifying all potential vulnerabilities prevent this displacement behavior. Maintain vigilance during first 60 days post-exclusion and address new attempts immediately with additional barrier materials.
Do I need permits for raccoon exclusion work?
Permit requirements vary by jurisdiction but commonly apply to structural modifications including roof work, chimney alterations, and foundation changes exceeding $500 in value. Many municipalities require permits for hardware cloth installation on roof structures or modifications affecting building envelope integrity. Contact local building departments before beginning work to understand specific requirements. Professional installation companies typically handle permit acquisition and inspection coordination as part of their service packages.
How much does professional raccoon exclusion cost compared to DIY?
Professional exclusion costs $1,200-$4,500 for comprehensive residential projects versus $400-$1,500 for DIY approaches, but professionals provide warranty coverage, liability insurance, and 95% success rates compared to 65% DIY success rates. Regional variations affect pricing significantly, with urban markets averaging 25-40% higher costs than rural areas. Professional services include inspection, materials, installation, cleanup, and follow-up monitoring that DIY projects require as separate expenses.
Can raccoons break through hardware cloth or metal flashing?
Raccoons can manipulate lightweight hardware cloth below 16-gauge thickness and tear through economy-grade materials using their 30-pound grip strength, but properly installed 16-gauge galvanized hardware cloth and 26-gauge metal flashing resist raccoon breakthrough attempts. Installation quality determines material effectiveness more than material strength alone. Proper fastening every 4-6 inches with washers and adequate overlap prevents failure points that raccoons exploit through persistent manipulation.
What’s the best time of year to do raccoon exclusion work?
Optimal exclusion timing occurs during summer months (June-August) when raccoon activity drops to 25% of seasonal peaks and young animals achieve independence from mothers. Avoid spring (March-May) when females establish dens and fall (September-November) when animals seek winter shelter. Winter exclusion (December-February) works in moderate climates but northern regions require consideration of freeze-thaw cycles affecting material installation and curing. Weather conditions requiring dry periods of 48 hours and temperatures above 40°F limit scheduling flexibility.
How do I raccoon-proof my home without damaging the structure?
Non-invasive exclusion techniques use existing mounting points, reversible fasteners, and compatible materials that don’t compromise structural integrity or void building warranties. Use self-drilling screws with rubber washers instead of lag bolts for roof installations, and choose sealants compatible with existing materials. Avoid modifications affecting load-bearing elements, electrical systems, or waterproofing integrity without professional consultation. Document all modifications with photographs and material specifications for future reference and potential reversal. Consider protecting outdoor areas naturally as part of your comprehensive exclusion strategy.