
Seasonal Checklist: Stop Woodpecker Problems Nesting Season

Every spring, woodpeckers return to the same spots on homes across California and the Pacific Coast states. The damage follows a predictable pattern, and without a structured seasonal plan, the cycle repeats year after year. This guide delivers a true month-by-month natural woodpecker prevention checklist, covering every phase from January preparation through post-season repair, using only chemical-free, humane methods that protect both your property and these federally protected birds.
Why Is Woodpecker Nesting Season the Most Dangerous Time for Your Home?
Most woodpecker damage does not happen randomly. It follows a predictable seasonal pattern driven by three distinct behaviors that all peak between February and July.

Territorial drumming (February through April) involves rapid pecking on resonant surfaces to establish territory and attract mates. Woodpeckers target metal gutters, hollow wood siding, and cedar shakes specifically because the resonance carries further, amplifying their signal.
Nesting cavity excavation (April through June) produces deep, rounded holes drilled into wood for nest chambers. According to the UC Davis Cooperative Extension IPM Program, this behavior causes the most structural damage and, once started, is extremely difficult to redirect without physical exclusion.
| Photo | Popular Pest Repellents | Price |
|---|---|---|
|
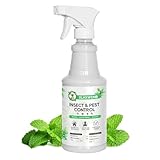
16/32oz Peppermint Spray to Repel Bugs & Insects - Natural Plant-Based Ant, Roach, Spider, Fly Repellent - Indoor/Outdoor Safe, Pet & Family Friendly Pest Control (16 Fl Oz) | Check Price On Amazon |

|
Nature's Dome Pest Control Starter Kit – Makes 3 Bottles (16 oz Each) – Eco-Friendly, Plant-Based Formula for Ant, Roach, Spider, Fly, Flea & Insect Control – Child & Pet Safe for Indoor/Outdoor Use | Check Price On Amazon |

|
(2025 Upgraded) Ultrasonic Insect & Pest Indoor Repeller – Stronger Driving Force, Plug-in Control Electronic Repellent for Roach, Mouse, Rodent, Bugs, Spider, Mice, Ant, 2 Mode Switching (6 Pack) | Check Price On Amazon |

|
LONYEON 8L Electric ULV Cold Fogger Machine with Backpack Mist Atomizer, Adjustable Flow Rate, Large Area Spraying for Home Indoor Outdoor | Check Price On Amazon |

|
Pest Control, Mouse Repellant Pouches, 10 Pack, Mice Repellent Indoor, Peppermint Oil for Rodents & Cucarachas & Spiders & Snakes, Safe Effective Rodent Repellent for Car Engines, RV, Home Use | Check Price On Amazon |
Foraging for insects (year-round, peaking April through July) creates irregular, scattered holes as woodpeckers search for bark beetles, carpenter ants, and wood-boring larvae beneath the surface. This pattern almost always signals an underlying insect infestation in the siding.
When territorial drumming, nesting, and foraging behaviors overlap in April and May, woodpecker activity at your home reaches its annual peak. The problem compounds because of site fidelity, the behavioral tendency for woodpeckers to return to the same locations year after year, meaning this season’s inaction directly creates next season’s damage.
In California and Pacific Coast states, nesting season begins two to three weeks earlier than the national average due to climate warming trends, with territorial drumming starting in February rather than late March, according to CDFW seasonal data.
The following table maps each behavior to its peak months, damage type, and hole appearance to help you identify what is happening before selecting the right prevention strategy.
| Behavior | Peak Months | Damage Type | Hole Appearance |
|---|---|---|---|
| Territorial drumming | Feb-Apr | Surface resonance damage | Shallow, scattered, no depth |
| Nesting cavity excavation | Apr-Jun | Deep structural holes | Round, 1.5-3 inch diameter, deep |
| Foraging for insects | Apr-Jul (year-round) | Scattered peck marks | Irregular rows, horizontal patterns |
| Post-nesting foraging | Aug-Sep | Moderate surface damage | Similar to foraging pattern |
California’s three most structurally damaging species are the Northern Flicker (Colaptes auratus), the Acorn Woodpecker (Melanerpes formicivorus), and the Downy Woodpecker (Dryobates pubescens). The highest-vulnerability siding materials are cedar siding, T1-11 plywood, and stucco.
Understanding which behavior is occurring and when is the foundation of an effective prevention strategy. The month-by-month action plan below translates this behavioral knowledge into specific, timed steps.
What Does a Month-by-Month Woodpecker Prevention Checklist Look Like?
The most effective woodpecker prevention strategy is not reactive. It starts in January, weeks before the first territorial drumming of the season, and continues through September with post-season assessment and repair.
Here is your complete natural pest control checklist, organized by seasonal phase. Each phase builds on the last, and skipping the pre-season window is the single most common reason deterrents fail.
Phase 1: Pre-Season Preparation Checklist (January-February)
January and February represent your most valuable prevention window. Woodpeckers are not yet drumming, nesting sites have not been selected, and you have full access to your home’s exterior without active bird activity to navigate.
As a natural pest management specialist, I have seen more prevention failures caused by starting in March than by any other single mistake. The checklist below gives you everything to complete before February 15 in California, and before late March in most other continental US states.
-
Conduct a full exterior inspection. Walk the entire perimeter of your home and note all existing woodpecker holes, damage areas, and resonant surfaces such as hollow-sounding wood, metal gutters, and cedar siding panels. Mark locations with weatherproof tape for reference during installation work.
-
Identify and treat underlying insect infestations. This is the root cause most homeowners miss entirely. Probe damaged siding areas for bark beetle galleries, carpenter ant trails, and wood-boring larvae (small sawdust piles at hole bases indicate active infestation). Treat naturally with food-grade diatomaceous earth applied directly into galleries, or consult a licensed Integrated Pest Management (IPM) specialist. Eliminating the food source removes the primary woodpecker attractant.
-
Install exclusion netting over high-risk areas. Attach bird-grade exclusion netting (minimum 3/4-inch mesh) over previously damaged siding sections, eaves, and fascia boards before February 15 in California. Secure with standoff brackets maintaining 3-inch clearance from the surface.
-
Attach reflective flash tape to corners and eaves. Install 2-inch metallic flash tape in 18-inch strips at 6-foot intervals along siding corners. Pre-season installation allows birds to associate your home with deterrents before territorial behavior begins.
-
Seal all existing woodpecker holes. Fill previous season’s holes with exterior-grade wood filler, then paint or stain to match. Unfilled holes signal to returning woodpeckers that your home is an established drumming and nesting site.
-
Note resonant surfaces for targeted Phase 2 treatment. Metal downspouts, hollow fascia, and loose trim boards amplify drumming and are disproportionately targeted. Flag these locations now for acoustic dampening installation in March.
Phase 2: Early Nesting Season Checklist (March-April)
March marks the beginning of active territorial drumming in most of North America, and February in California and Pacific Coast states. Your Phase 1 work should already be in place. Phase 2 focuses on active deterrence as woodpecker behavior intensifies.
-
Deploy predator decoys at damage-prone locations. Place realistic owl or hawk decoys with reflective eyes within 15 feet of previously targeted areas. Move decoys every 3 to 5 days because stationary decoys lose effectiveness within one week as woodpeckers habituate to them.
-
Install resonance-dampening materials on metal surfaces. Wrap metal downspouts and gutters near previous drumming locations with foam pipe insulation or weatherproof foam tape. Drumming on non-resonant surfaces offers no territorial communication benefit, eliminating the behavioral motivation entirely.
-
Apply natural capsaicin deterrent spray. Mix 2 tablespoons of cayenne pepper or 1 teaspoon of capsaicin extract per quart of warm water with 1 teaspoon of dish soap as an emulsifier. Apply to siding surfaces (test on an inconspicuous area first for staining), and reapply every 5 to 7 days and after rain.
-
Add wind-activated visual deterrents. Hang holographic pinwheels, reflective wind spinners, or mylar flash tape strips in moving-air locations near eaves. The motion-plus-reflection combination is more effective than static deterrents alone.
-
Check and reinforce exclusion netting. Verify all netting installed in Phase 1 is secure, gap-free, and undamaged. Replace any compromised sections immediately because active-season gaps are exploited within hours.
-
Begin a weekly monitoring log. Document woodpecker activity locations, times, and frequency. Patterns reveal whether your deterrents are working or whether targeted escalation is needed before peak season arrives.
For homeowners dealing with woodpeckers on balconies, window ledges, or deck rails, natural methods specific to those surfaces require slightly different installation approaches than open siding.
Phase 3: Peak Nesting Season Active Defense Checklist (May-June)
May and June represent peak woodpecker nesting season. This is the highest-risk period for new cavity excavation and also the period with the most legal restrictions on intervention. Your strategy shifts from prevention to active defense while staying within federal wildlife protection law.
Legal Note: Migratory Bird Treaty Act (16 U.S.C. §§ 703-712)
Woodpeckers are protected under the federal Migratory Bird Treaty Act, enacted in 1918. It is illegal to kill, trap, or destroy active nests or eggs without a federal depredation permit from the US Fish and Wildlife Service. Violations carry fines up to $15,000 and potential imprisonment. All deterrent methods in this checklist are non-lethal and explicitly legal. For severe structural damage requiring a depredation permit, contact USDA Wildlife Services or the California Department of Fish and Wildlife (CDFW) at wildlife.ca.gov.
-
Rotate all visual deterrents on a weekly schedule. Woodpeckers habituate to static deterrents within 1 to 2 weeks during high-motivation nesting season. Move owl decoys to new positions, replace reflective tape strips, and add new deterrent types weekly to maintain the novelty effect.
-
Deploy bioacoustic deterrents for persistent birds. Play species-specific woodpecker distress calls or predator vocalizations through a motion-activated speaker near active drumming or excavation sites. The Cornell Lab of Ornithology’s Merlin Bird ID app can help you identify the specific woodpecker species so you can select targeted audio. Run sound deterrents for 10 to 15 minute intervals to avoid habituation.
-
Install hardware cloth over active excavation attempts. If nesting cavity excavation has begun but no eggs are yet present, immediately cover the site with 1/4-inch galvanized hardware cloth secured 3 inches from the surface. Once eggs are laid, this intervention is legally restricted under the MBTA.
-
Apply fresh capsaicin spray weekly. Peak season requires consistent reapplication due to rain, UV degradation, and increased surface contact from persistent birds. Maintain a 5 to 7 day reapplication schedule throughout May and June.
-
Redirect with a suet feeder station. Install a woodpecker suet feeder at least 30 feet from your home, positioned near mature trees. Providing a food source away from your structure redirects foraging behavior without confrontation. Use no-melt suet cakes for warm-season feeding.
-
Document new hole attempts within 24 hours. Any new excavation marks should be photographed, dated, and addressed within 24 hours with hardware cloth or netting before the woodpecker establishes the site as its nesting location.
Phase 4: Post-Nesting Season Assessment Checklist (July-September)
By late July, fledglings have typically left the nest and woodpecker activity begins to decrease. This window, July through September, is your opportunity to repair damage, reinforce weak points, and prepare proactively for next year before the problem restarts.
-
Complete a full post-season damage assessment. Document all new holes, excavation attempts, and drumming damage created during the season. Photograph and measure each site for repair planning and year-over-year comparison to track whether prevention effectiveness is improving.
-
Repair all woodpecker holes with pest-resistant materials. Fill holes with exterior-grade epoxy wood filler (more durable than standard wood filler). For larger excavation holes, use 1/4-inch hardware cloth backing before filling to prevent re-excavation at the same weakened site. Sand and paint to match.
-
Conduct a second insect infestation inspection. Summer is prime season for bark beetle and carpenter ant activity. Re-probe siding, fascia, and eave areas for new insect galleries. Apply diatomaceous earth or consult an IPM specialist for natural treatment. Eliminating insects now prevents woodpecker attraction next spring.
-
Assess siding material vulnerability for long-term decisions. If cedar or T1-11 siding sustained repeated damage, evaluate whether replacement with woodpecker-resistant fiber cement board (Hardie board) or vinyl siding is cost-effective. These materials lack the soft, insect-harboring qualities that make natural wood a preferred target.
-
Remove or treat dead trees and snags within 100 feet. Standing dead trees (snags) are the natural preferred nesting habitat of cavity-nesting woodpeckers. Safely removing dead trees near your home eliminates the preferred natural alternative that can pull woodpecker activity toward your structure when snags are absent from the landscape.
-
Store and inventory your deterrent equipment. Clean, dry, and store all deterrent equipment. Note what needs replacement before January Phase 1 preparation begins, and set a calendar reminder for your January inspection date to ensure you do not miss the optimal pre-season window.
With your seasonal checklist complete, the next step is to address the root cause that most homeowners miss entirely, and why eliminating it is often more effective than any deterrent.
What Is Actually Attracting Woodpeckers to Your Home? (The Root Cause Most Homeowners Miss)
Before investing in deterrents, ask this question: why is your home more attractive to woodpeckers than the trees in your yard? In most cases, the answer is insects.
When wood-boring insects such as bark beetles, carpenter ants, wood-boring beetle larvae, and termites infest siding, fascia, or structural wood, they create auditory and olfactory signals that woodpeckers detect from significant distances. According to the UC Davis Cooperative Extension IPM Program, treating the underlying insect infestation is one of the most effective long-term woodpecker deterrence strategies because it eliminates the primary attractant entirely.
A woodpecker foraging on your siding is, in most cases, responding to an actual food source beneath the surface. This is not random behavior, and deterrents applied over an active infestation are competing against a powerful biological drive that will eventually overcome any surface-level barrier.
In California specifically, bark beetle populations in the Sierra Nevada surged dramatically due to drought stress in recent years, driving Hairy Woodpecker and Acorn Woodpecker populations closer to residential areas in foothill communities, according to USDA Forest Service Sierra Nevada outbreak reports.
Siding material also plays a direct role in attracting or resisting woodpecker activity. The table below compares the five most common siding types by vulnerability level.
| Siding Material | Vulnerability Level | Primary Reason |
|---|---|---|
| Cedar and redwood siding | Very High | Soft, easily excavated, harbors insects readily |
| T1-11 plywood siding | Very High | Soft wood grain, common insect galleries |
| Stucco | Moderate | Drumming target; can hide wasp nests behind surface |
| Vinyl siding | Low | Low insect risk; some drumming on resonant hollow panels |
| Fiber cement (Hardie board) | Very Low | Hard, insect-resistant, poor acoustic resonance |
The diagnostic table below helps you determine whether insects are the root cause of your woodpecker activity before committing to a deterrent strategy.
| Sign Observed | What It Indicates | Natural Treatment |
|---|---|---|
| Sawdust at base of hole | Active wood-boring beetle larvae | Food-grade diatomaceous earth in galleries |
| Horizontal row of small holes | Sapsucker sap wells or carpenter ant trail | Inspect for ant colony; neem oil on entry points |
| Woodpecker returns same spot daily | Active insect colony present | Professional IPM inspection recommended |
| Multiple irregular holes across siding | Bark beetle infestation | DE treatment plus structural sealing |
| Drumming only, no excavation | Resonance, not insects | Acoustic dampening (Phase 2 checklist) |
Once you have addressed or ruled out root-cause insects, the natural deterrent methods below work significantly more effectively because they are no longer competing against an active biological food drive.
What Are the Most Effective Natural Woodpecker Deterrents for Nesting Season?
Natural woodpecker deterrents work through four primary mechanisms: visual disruption, acoustic interference, physical exclusion, and chemical repellency. According to USDA Wildlife Services bird damage management guidelines, the most effective prevention programs combine at least two deterrent categories simultaneously and rotate methods regularly to prevent habituation.
Visual Deterrents: What Works and What Doesn’t
Reflective flash tape and mylar strips are highly effective for one to three weeks and must be moved and refreshed regularly. Best placement is within 6 feet of active damage sites in locations with consistent wind movement.
Predator decoys (owl and hawk models with reflective eyes) are effective initially, but habituation occurs within 7 to 14 days. Effectiveness is dramatically extended by moving the decoy every 3 to 5 days and combining it with motion-activated features.
Holographic pinwheels and wind spinners provide good supplemental deterrence in high-wind areas. The motion-plus-light-reflection combination outperforms either element alone.
What does not work: static decoys left unmoved for weeks, single deterrent types used without rotation, and deterrents placed more than 10 feet from the damage site.
Acoustic Deterrents: Using Sound to Discourage Woodpeckers Naturally
Bioacoustic devices using motion-activated speakers playing woodpecker distress calls or hawk vocalizations represent the most effective acoustic option. Species-specific calls identified through the Cornell Lab of Ornithology’s Merlin Bird ID app outperform generic predator sounds significantly.
Wind chimes offer some limited effectiveness for drumming deterrence near specific locations but are not reliable as standalone solutions. They perform best in combination with visual deterrents.
Ultrasonic repellers have mixed evidence for woodpecker deterrence specifically. Woodpeckers rely primarily on visual and human-audible acoustic signals, making ultrasonic devices poorly matched to their sensory biology.
Resonance dampening is among the most underutilized and effective strategies. Applying foam pipe insulation to metal downspouts and weatherstripping to hollow fascia removes the acoustic reward that motivates territorial drumming at those sites.
Physical Exclusion: The Most Reliable Long-Term Natural Method
Physical exclusion is the only deterrent method with near-100% effectiveness when properly installed because it makes the target surface physically inaccessible regardless of the woodpecker’s motivation.
-
Select appropriate material. Use bird-grade exclusion netting (3/4-inch mesh, UV-stabilized polypropylene) for large siding sections. Use 1/4-inch galvanized hardware cloth for individual hole sites and eave gaps.
-
Install standoff brackets. Position brackets 3 inches from the siding surface. Netting must not contact the surface or woodpeckers will peck through it, defeating the purpose entirely.
-
Secure all edges. Use weatherproof staples or cable ties to close every gap. Leave no gap larger than 1/4 inch at corners and eave junctions.
-
Follow seasonal installation timing. Install by February 1 in California. Netting can be removed after July 15 once nesting season has fully concluded.
-
Address aesthetics. Netting is relatively unobtrusive when installed flush with the roofline. Color-matched netting reduces visual impact on cedar and wood-tone siding.
Natural DIY Repellent Sprays: Chemical-Free Recipes That Actually Work
These natural repellent sprays leverage sensory deterrents that discourage woodpecker contact without harming birds, pets, or plants. Always test on an inconspicuous area before full application to check for staining.
Recipe 1: Capsaicin Deterrent Spray
- 2 tablespoons pure cayenne pepper OR 1 teaspoon capsaicin extract
- 1 quart warm water
- 1 teaspoon liquid dish soap (acts as emulsifier and spreader)
Mix thoroughly and apply to siding with a garden sprayer. Reapply every 5 to 7 days and after each rain event. Avoid application near bird feeders or water sources. The spray is safe for plants and humans once dry.
Recipe 2: Peppermint Oil Deterrent
- 10 to 15 drops pure peppermint essential oil
- 1 cup water
- 1 teaspoon dish soap
Apply to siding surfaces and eave edges. The strong scent deters initial site investigation but is less durable than capsaicin. Reapply every 3 to 4 days for consistent effect.
My experience using capsaicin spray on cedar siding alongside exclusion netting has consistently outperformed either method alone in breaking the return cycle for site-faithful woodpeckers. DIY sprays work best as supplemental deterrents combined with physical exclusion or visual methods, not as standalone solutions.
For additional landscape-level strategies that reduce woodpecker attraction from your yard and surrounding vegetation, specific planting and landscaping changes can meaningfully reduce the number of woodpeckers foraging close to your structure.
Is It Legal to Deter Woodpeckers During Nesting Season? What You Need to Know
Woodpeckers are among the most legally protected birds in North America. Understanding the boundaries of permitted intervention during nesting season protects both the birds and you from federal violation risk.
The Migratory Bird Treaty Act (16 U.S.C. §§ 703-712), enacted in 1918, makes it a federal offense to kill, capture, possess, or disturb any migratory bird species, their active nests, or their eggs without a federal permit. All North American woodpecker species are covered. Violations carry fines up to $15,000 and potential imprisonment. All deterrent methods in this checklist are explicitly legal because they are non-lethal, non-trapping, and do not disturb active nests.
California adds further protections through the California Fish and Game Code, administered by CDFW. Property owners experiencing severe structural damage may apply for a federal depredation permit through USDA Wildlife Services, which authorizes certain removal options as a last resort after documented failure of non-lethal methods. Contact CDFW at wildlife.ca.gov or USDA Wildlife Services for California-specific depredation permit guidance.
| Action | Legal Status | Notes |
|---|---|---|
| Installing exclusion netting | Legal | Cannot block an active nest with eggs |
| Reflective deterrents, decoys | Legal | No restrictions |
| Bioacoustic distress calls | Legal | Non-harmful to birds |
| Capsaicin and essential oil sprays | Legal | Non-toxic, non-lethal |
| Sealing holes before nesting | Legal | Best done in January-February pre-season window |
| Removing or covering active nest with eggs | Illegal | Federal MBTA violation |
| Killing or trapping woodpeckers | Illegal without permit | Federal depredation permit required |
| Moving or harassing nesting birds | Illegal | MBTA violation regardless of damage severity |
For specific situations not clearly covered by this table, consult CDFW or USDA Wildlife Services directly before taking any action during active nesting season.
What Should You NOT Do When Trying to Deter Woodpeckers During Nesting Season?
Some of the most commonly recommended woodpecker deterrents either do not work as advertised, cause habituation that makes future deterrence harder, or create unintended consequences for birds, your property, or your neighbors.
-
Do not use a single deterrent type without rotation. Woodpeckers are highly intelligent and habituate rapidly to unchanging stimuli. A fake owl left in one spot for three weeks is effectively invisible to an experienced woodpecker. Single-method approaches almost universally fail within two weeks of deployment.
-
Do not ignore the problem hoping it resolves on its own. Woodpeckers demonstrate strong site fidelity, returning to the same locations year after year. Inaction in year one virtually guarantees escalating damage in subsequent seasons as the site becomes encoded as a reliable resource.
-
Do not install netting that contacts the surface directly. Netting pressed against siding can still be pecked through. The 3-inch standoff gap created by proper bracket installation is non-negotiable for effectiveness, not optional.
-
Do not use sticky adhesive repellents such as Tanglefoot on exposed surfaces. While technically legal in most situations, sticky repellents can trap small birds, beneficial insects, and other wildlife. They are inconsistent with natural pest control principles and are not recommended in this guide.
-
Do not seal holes while a woodpecker is actively using them. Sealing an active nesting cavity during nesting season may trap birds inside or violate MBTA protections. Seal only confirmed-inactive holes or in the January-February off-season window.
-
Do not attempt removal or trapping without a federal depredation permit. The federal fines and criminal charges that can result far outweigh the property damage that motivated the attempt. This is not a risk worth taking.
-
Do not neglect the insect infestation root cause. Deterrents applied over an active insect infestation are competing against a powerful biological drive. The woodpecker will find gaps and workarounds consistently. Treat the insect problem first, then deploy deterrents.
When Should You Stop DIY and Call a Wildlife Professional?
Most woodpecker damage can be successfully prevented with the natural methods in this checklist. Certain situations require professional intervention, and recognizing those thresholds early saves significant structural damage and cost.
Escalate to a licensed IPM specialist or pest control professional when:
- Woodpecker damage reveals extensive insect infestation with visible galleries, large-scale carpenter ant activity, or active termite presence. Natural treatments may be insufficient at this scale.
- Multiple new excavation holes appear within 48 hours despite active deterrence deployment. This indicates highly motivated nesting behavior paired with significant insect activity.
- Damage is occurring on a commercial building, multi-story structure, or cedar shake roof where safety and access concerns require professional equipment.
Escalate to USDA Wildlife Services or CDFW when:
- You require a federal depredation permit to authorize removal or nest destruction for documented severe structural damage.
- You discover damage consistent with a Pileated Woodpecker (Dryocopus pileatus), which creates exceptionally large rectangular holes, or suspect a Red-cockaded Woodpecker, which is listed under the Endangered Species Act.
- You are in California and need state-specific wildlife officer guidance for your specific situation.
The following cost benchmarks will help with budget planning before you engage professional services.
| Service or Solution | Estimated Cost Range |
|---|---|
| DIY deterrent setup (netting, decoys, flash tape) | $40 to $120 |
| Professional bird exclusion installation | $300 to $800 per siding section |
| Woodpecker damage structural repair | $200 to $800 per section (ThisOldHouse estimate) |
| IPM insect inspection and initial treatment | $150 to $400 |
The goal is not to scare readers into hiring professionals immediately. These thresholds exist to help you make that decision wisely, with clear criteria rather than frustration alone driving the choice.
STEP-BY-STEP GUIDE
Complete Seasonal Woodpecker Prevention Checklist – Phase by Phase
4 seasonal phases · January through September · Natural methods only
Phase 1: Pre-Season Prep (January-February)
Inspect exterior, treat insect infestations, install exclusion netting, seal old holes, and attach reflective tape before February 15 in California. This is the highest-value prevention window of the entire year.
Phase 2: Early Nesting Season (March-April)
Deploy predator decoys and move them every 3-5 days, install resonance dampening on metal surfaces, apply capsaicin spray, and begin a weekly monitoring log to track deterrent effectiveness.
Phase 3: Peak Nesting Season (May-June)
Rotate all deterrents weekly, deploy bioacoustic devices for persistent birds, cover new excavation attempts with hardware cloth (before eggs are laid), and redirect foraging with suet feeders placed 30 feet from the structure.
Phase 4: Post-Season Assessment (July-September)
Complete damage documentation and repair, conduct a second insect inspection, evaluate siding material vulnerability, remove nearby dead trees, and inventory deterrent equipment for next January’s preparation.
Frequently Asked Questions About Preventing Woodpecker Problems During Nesting Season
When Exactly Is Woodpecker Nesting Season, and When Should I Start Taking Preventive Action?
Woodpecker nesting season spans February through July in California and Pacific Coast states, and March through July in most of the continental United States. The preparation window (Phase 1 of the checklist) should begin in January, four to six weeks before the first territorial drumming begins.
Starting in March is too late for optimal prevention in California. Climate warming trends have pushed California nesting start dates two to three weeks earlier than historical averages, per CDFW seasonal data, making January the only reliable starting point for Pacific Coast homeowners.
How Do I Tell the Difference Between a Nesting Hole, a Foraging Hole, and a Drumming Site?
Nesting holes are round, 1.5 to 3 inches in diameter, deep (4 to 12 inches), usually in a single location, and excavated deliberately over several days. Foraging holes are irregular, scattered, less than 1 inch deep, and often appear in horizontal rows or clusters indicating active insect presence below the surface.
Drumming damage appears as very shallow surface marks on resonant materials (metal, hollow wood), with rapid repeated strikes but no excavation depth and no wood chips on the ground. Correctly identifying the damage type determines your treatment: nesting holes need exclusion netting, foraging holes need insect treatment, and drumming requires resonance dampening.
Can Treating an Insect Infestation Really Prevent Woodpeckers From Coming Back?
Yes, and it is one of the most underutilized prevention strategies available. The UC Davis Cooperative Extension IPM Program explicitly identifies treating the underlying insect infestation as a primary woodpecker management strategy because it eliminates the primary foraging motivation entirely.
Natural treatment options include food-grade diatomaceous earth applied to insect galleries, neem oil applied to insect entry points, and borate-based wood treatments that kill wood-boring larvae without toxic residue. Recurring woodpecker activity at the same site year after year is a strong indicator of a persistent insect infestation requiring professional IPM assessment.
Is It Legal to Block a Woodpecker Hole During Nesting Season?
It depends on whether the nest is active. If no eggs or young are present, sealing the hole with hardware cloth or wood filler is legal and recommended under the Migratory Bird Treaty Act (16 U.S.C. §§ 703-712). Once eggs have been laid or hatchlings are present, disturbing or blocking the active nest cavity is a federal violation regardless of the damage severity.
The safest approach is to seal all holes in the January through February pre-season window before nesting begins. If you discover an active nest, document the location and wait until late July when fledglings have departed before sealing. Contact CDFW or USDA Wildlife Services if you are unsure whether a cavity is actively occupied.
Why Do Woodpeckers Keep Returning to the Same Spot on My House Every Spring?
This is woodpecker site fidelity, the behavioral tendency to return to previously successful foraging, drumming, or nesting locations. Once a woodpecker has successfully drummed on a resonant surface or found food at a specific site, that location is encoded as a reliable resource in its behavioral memory.
Breaking the cycle requires sealing all previous holes in January, treating insect infestations, and deploying deterrents before the woodpecker returns in early spring, not after it has already relocated to its remembered site. Inaction after the first season of damage is the primary driver of multi-year escalating damage patterns.
What Are the Safest Natural Woodpecker Repellent Options for Homes With Children and Pets?
All deterrent methods in this guide are designed to be safe for children and pets when properly used. For capsaicin spray, avoid skin and eye contact during application and keep children and pets away from treated surfaces for 30 minutes after application. The spray is safe once dry.
Reflective tape and netting carry no chemical hazard. Ensure netting edges are fully secured to prevent small animal entanglement. Bioacoustic motion-activated devices are safe when not operated continuously at high volume near sleeping areas. Food-grade diatomaceous earth is safe once settled but avoid inhalation during application. Sticky adhesive repellents such as Tanglefoot are not recommended in this guide due to risk of unintended wildlife entanglement.
Does the Type of Siding on My House Affect How Much Woodpecker Damage I’ll Experience?
Significantly, yes. Cedar shake, cedar lap siding, redwood, and T1-11 plywood siding are the highest-risk materials because they are soft, insect-harboring, easily excavated, and acoustically resonant. Fiber cement board (Hardie board) is the most woodpecker-resistant common siding material because it is hard, non-resonant, insect-resistant, and lacks the soft grain that woodpeckers prefer for excavation.
Homeowners with repeated severe cedar siding damage should evaluate whether replacement with fiber cement is cost-justified given long-term structural repair expenses of $200 to $800 per section. The material investment typically recovers within two to three seasons of avoided damage.
How Do I Protect Trees in My Yard From Woodpeckers During Nesting Season Without Harming the Tree or the Bird?
For fruit trees and ornamentals, wrap the trunk and primary branches in burlap tree wrap or loosely applied bird-grade netting from February through July, ensuring the material does not constrict branch growth. For large landscape trees showing active woodpecker excavation, assess whether an insect infestation such as bark beetles or emerald ash borer is the underlying cause.
Standing dead trees (snags) within 100 feet of your home are the most powerful attractant for cavity-nesting woodpeckers. Safe removal during winter when no active nests are present significantly reduces spring woodpecker pressure on nearby structures by redirecting natural nesting behavior to areas further from your home.
SEASONAL GUIDE
Woodpecker Prevention – Month-by-Month Action Calendar
What to do each month for maximum natural prevention effectiveness. Source: CDFW, UC Davis IPM Program, USDA Wildlife Services
Off-season maintenance
The seasonal woodpecker prevention checklist in this guide gives you a complete, natural, and legally compliant framework to stop recurring spring damage before it begins. Starting in January with the pre-season preparation phase, treating underlying insect infestations as the root cause, combining multiple rotating deterrent types, and completing a thorough post-season assessment are the four steps that separate effective prevention from repeated failure. For a broader foundation in chemical-free home pest management across all pest types, the Natural Pest Control Definitive Homeowner Handbook provides integrated strategies that complement the woodpecker-specific approach covered here. Begin with your January inspection, follow the phase-by-phase checklist, and you will break the cycle that has brought woodpeckers back to the same spots on your home year after year.
| Photo | Popular Pest Repellents | Price |
|---|---|---|
|
|
16/32oz Peppermint Spray to Repel Bugs & Insects - Natural Plant-Based Ant, Roach, Spider, Fly Repellent - Indoor/Outdoor Safe, Pet & Family Friendly Pest Control (16 Fl Oz) | Check Price On Amazon |
|
|
Nature's Dome Pest Control Starter Kit – Makes 3 Bottles (16 oz Each) – Eco-Friendly, Plant-Based Formula for Ant, Roach, Spider, Fly, Flea & Insect Control – Child & Pet Safe for Indoor/Outdoor Use | Check Price On Amazon |
|
|
(2025 Upgraded) Ultrasonic Insect & Pest Indoor Repeller – Stronger Driving Force, Plug-in Control Electronic Repellent for Roach, Mouse, Rodent, Bugs, Spider, Mice, Ant, 2 Mode Switching (6 Pack) | Check Price On Amazon |
|
|
LONYEON 8L Electric ULV Cold Fogger Machine with Backpack Mist Atomizer, Adjustable Flow Rate, Large Area Spraying for Home Indoor Outdoor | Check Price On Amazon |
|
|
Pest Control, Mouse Repellant Pouches, 10 Pack, Mice Repellent Indoor, Peppermint Oil for Rodents & Cucarachas & Spiders & Snakes, Safe Effective Rodent Repellent for Car Engines, RV, Home Use | Check Price On Amazon |
